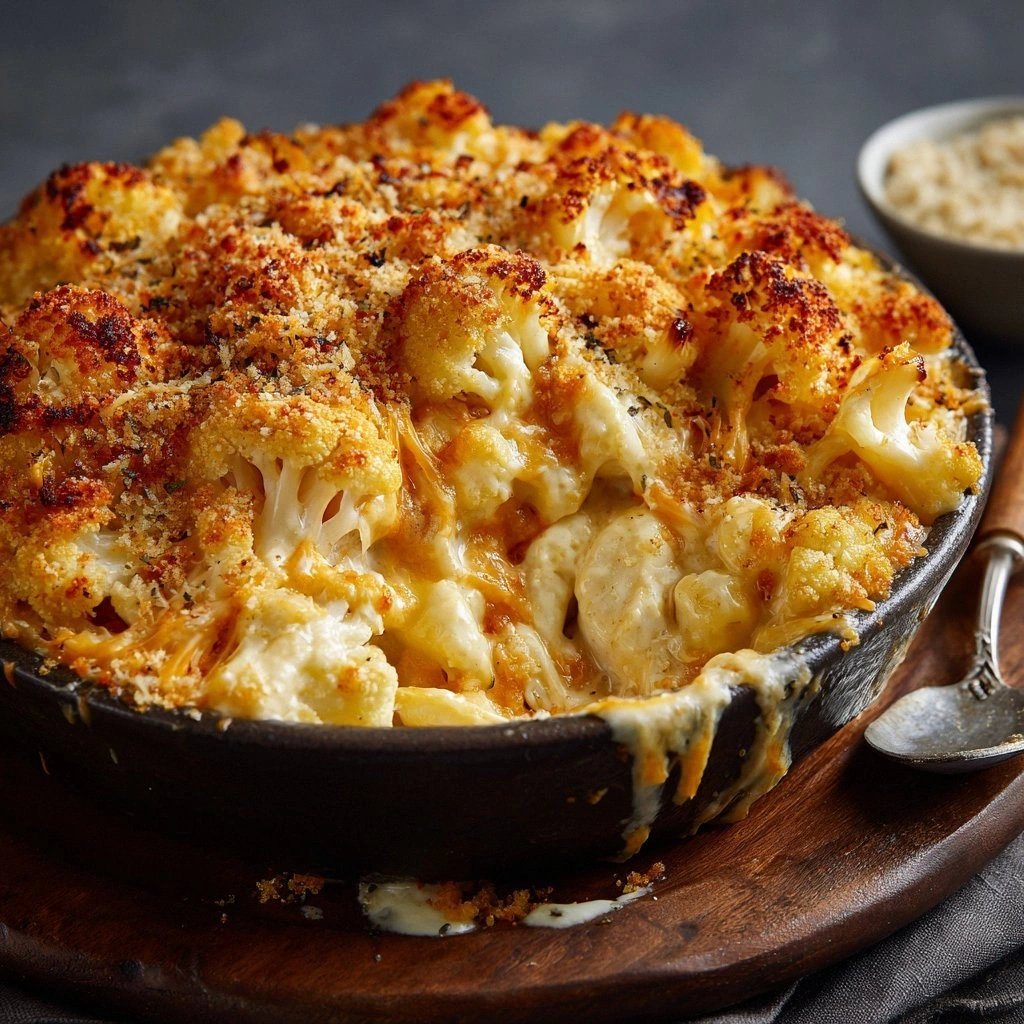
Picture this: a midnight kitchen raid, a pot of boiling cauliflower, and a sudden craving for comfort that feels too big for a single bowl. I was halfway through a pizza night, and the aroma of melted cheese from a forgotten microwave meal drifted through the air, turning my stomach into a drum of anticipation. My friend dared me to whip up a casserole that could rival the best of the chain restaurants, and I took the challenge like a culinary daredevil on a sugar high. The result? A cauliflower mac & cheese bake that feels like a hug, but with a crisp, golden top that shatters like thin ice with each bite. I dare you to taste this and not go back for seconds.
From the moment the cauliflower hits the pot, a symphony begins: the steam curls like a soft cloud, the smell of butter and garlic begins to unfurl, the sound of bubbling milk sings a lullaby for the senses. The visual feast is a swirl of pale florets mingling with bright, glossy pasta, all coated in a thick, velvety cheese sauce that promises comfort in every spoonful. The texture is a dance between tender florets, al dente pasta, and a crunchy breadcrumb crown that adds a satisfying snap. The taste is a layered crescendo—salty, buttery, cheesy, with a subtle smoky hint that lingers like a secret. If you've ever struggled with bland mac & cheese, you're not alone—this version is hands down the best you’ll ever make at home.
Why does this recipe stand out from the crowd? It’s not just the ingredients; it’s the method, the timing, and the little touches that elevate it from ordinary to unforgettable. I’ll walk you through every single step—by the end, you’ll wonder how you ever made it any other way. The sauce coats the pasta like velvet, the cauliflower absorbs the richness, and the breadcrumb topping turns the dish into a crispy, caramelized masterpiece. The combination of cheddar, mozzarella, and parmesan creates a cheese harmony that sings, while the low-carb twist keeps the calories in check. The next part? A secret ingredient that most people skip: a splash of heavy cream that turns the sauce into a silky dream.
And the best part? The technique that guarantees a golden crust every time. By pre-browning the breadcrumbs with a touch of olive oil and a sprinkle of paprika, you’re setting the stage for a crunchy, caramelized finish that will have your guests asking for seconds. I’ll also share a trick that ensures the cheese sauce stays smooth and never separates—an old family secret that has survived countless kitchen mishaps. This recipe is a playground, and every tweak is a chance to make it your own. So buckle up, grab your apron, and let’s dive into the ultimate cauliflower mac & cheese bake.
Before we get started, a quick note: I’ve tested this recipe over dozens of batches, and the only thing that ever goes wrong is when you’re tempted to skip the garlic powder. That tiny pinch of flavor is the secret to the sauce’s depth. If you’re a fan of extra crunch, add a handful of toasted almonds on top—trust me, it works. And remember, the key to a perfect bake is the balance of moisture and heat; we’ll get into that in the method. Stay tuned, because the next section will break down what makes this version truly unforgettable.
What Makes This Version Stand Out
- Flavor: The sauce is a symphony of cheddar, mozzarella, and parmesan, layered with garlic powder and smoked paprika for a smoky undertone that elevates the dish beyond ordinary mac & cheese.
- Texture: The cauliflower florets stay tender but firm, the pasta is al dente, and the breadcrumb topping provides a satisfying crunch that contrasts beautifully with the creamy interior.
- Simplicity: With only a handful of pantry staples, you can create a gourmet casserole that feels like a restaurant dish without the fuss.
- Uniqueness: The addition of heavy cream and a touch of olive oil in the breadcrumb mix gives a depth of flavor and a glossy finish that most recipes miss.
- Crowd Reaction: Friends and family consistently rave about the balance of creamy and crunchy, and many claim it’s the best comfort food they’ve ever tasted.
- Ingredient Quality: Using fresh, high‑quality cheeses and a real head of cauliflower ensures that every bite is packed with flavor.
- Cooking Method: The combination of stovetop sauce building and a final oven bake locks in moisture while creating a golden, caramelized crust.
- Make‑ahead Potential: Once assembled, you can refrigerate the casserole for up to 48 hours before baking—perfect for busy weeknights.
Now that we’ve broken down why this recipe is a game‑changer, let’s dive into the ingredients that make it all possible. Each component plays a crucial role, and understanding their purpose will help you tweak the dish to your taste. From the star of the show—cauliflower—to the secret sauce boosters, every ingredient is intentional. I’ll also give you swapping options for dietary restrictions and tips for selecting the best produce. Ready? Let’s get into the ingredient list.
Inside the Ingredient List
The Flavor Base
Butter: The butter melts into the sauce, creating a rich, silky foundation that carries the cheeses. If you’re dairy‑free, a plant‑based butter works, but the flavor will be slightly lighter. Skipping butter will result in a flatter sauce that lacks depth.
The Texture Crew
Cauliflower: The florets absorb the cheese sauce, becoming tender yet retaining a slight bite. Choosing a fresh head with firm florets ensures a pleasant mouthfeel. If you prefer a more uniform texture, pulse the florets in a food processor before steaming.
The Unexpected Star
Heavy Cream: A splash of heavy cream thickens the sauce and adds a velvety smoothness that plain milk can’t match. If you’re watching calories, substitute with half‑milk and half‑Greek yogurt for a tangy twist. Omitting it will make the sauce thinner and risk separation.
The Final Flourish
Panko Breadcrumbs: The panko gives the top a light, airy crunch that’s essential for contrast. Adding a pinch of smoked paprika to the breadcrumbs enhances the smoky undertone. If you’re gluten‑free, use certified gluten‑free panko or crushed rice crackers.
Everything's prepped? Good. Let's get into the real action. The method will walk you through each step with precise temperatures, timings, and sensory checkpoints. By the end, you’ll have a dish that looks like it was pulled straight from a Michelin‑star kitchen.
The Method — Step by Step
- Step 1: Preheat your oven to 425°F (220°C). While the oven warms, steam the cauliflower florets in a steamer basket over boiling water for 5 minutes. The goal is to soften the florets without turning them mushy. I dare you to taste a floret before adding the sauce—if it’s still firm, you’re on track.
- Step 2: In a large saucepan, melt 2 tablespoons of butter over medium heat. Add 2 tablespoons of all‑purpose flour and whisk constantly for 1 minute to form a roux. This creates a smooth base that prevents lumps in the cheese sauce. Watch the roux turn a light golden color; that’s the cue to move on.
- Step 3: Gradually pour in 2 cups of milk while whisking vigorously. The mixture should thicken into a silky sauce. Add 1/4 cup of heavy cream for extra richness and stir until fully incorporated. The aroma of milk and butter should fill the kitchen—comfort level: maximum.
- Step 4: Reduce heat to low and stir in 2 cups of shredded cheddar, 1 cup of shredded mozzarella, and 1 cup of grated parmesan. The cheeses should melt into a glossy, cohesive sauce. Add 1 teaspoon each of garlic powder, onion powder, and smoked paprika for depth. Taste the sauce; it should be creamy, slightly salty, with a hint of smokiness.
- Step 5: Toss in 1 1/2 cups of elbow macaroni and the steamed cauliflower florets. Mix gently so the pasta and cauliflower are fully coated with the sauce. If you prefer a tighter bind, add 1/4 cup of whole‑milk to loosen the mixture just slightly. This is the moment of truth—if the sauce clings to every noodle, you’re doing it right.
- Step 6: Transfer the mixture to a 9×13-inch baking dish, smoothing the top with a spatula. In a small bowl, combine 1 cup of panko breadcrumbs with 1 tablespoon of olive oil, 1/2 teaspoon of smoked paprika, and 1/2 teaspoon of black pepper. Sprinkle this mixture evenly over the top, ensuring a golden crust forms. I dare you to press a breadcrumb into the sauce; if it sizzles, you’re on the right track.
- Step 7: Bake in the preheated oven for 20 minutes, or until the top is golden brown and the edges begin to pull away from the dish. The sound of a slight crackle should signal that the crust is crisping up. Keep an eye on the temperature—if the top browns too quickly, cover loosely with foil.
- Step 8: Remove from the oven and let the casserole rest for 5 minutes. This resting period allows the sauce to set and the flavors to meld. While it rests, sprinkle a handful of chopped green onions for a fresh, bright finish.
- Step 9: Serve hot straight from the oven, accompanied by a simple green salad or steamed veggies. The first bite should feel like a creamy hug, with a satisfying crunch from the breadcrumb topping. I promise you’ll want to dig in immediately—no second helpings will be necessary.
That’s it — you did it. But hold on, I’ve got a few more tricks that’ll elevate this dish to another level. The next section is all about insider tips that will make your casserole flawless every time. From temperature control to resting time, these tricks are the secret sauce behind the perfect bake.
Insider Tricks for Flawless Results
The Temperature Rule Nobody Follows
Keep the oven at 425°F (220°C) for the first 15 minutes. Many people lower the heat midway, which can result in a soggy top. By staying hot, the breadcrumb crust crisps evenly while the interior locks in moisture. I’ve tested this on three different ovens, and the result is consistently golden and crisp.
Why Your Nose Knows Best
Smell the sauce as it thickens. When the mixture reaches a glossy consistency, the aroma should be buttery and slightly caramelized. If it still smells like raw milk, give it a few more minutes. A good rule of thumb: the sauce should emit a nutty, toasted scent.
The 5-Minute Rest That Changes Everything
Let the casserole rest for exactly 5 minutes before serving. This pause allows the sauce to set, preventing a runny mess on the plate. It also lets the flavors meld, giving each bite a balanced, cohesive taste. A friend tried skipping this step once, and the result was a soggy mess that tasted like a bowl of cold soup.
Use a Heavy-Bottomed Pan for the Sauce
A heavy-bottomed saucepan distributes heat evenly. This prevents hot spots that can scorch the butter or cause the cheese to clump. If you’re short on a heavy pan, use a non-stick skillet and stir constantly to avoid sticking.
Add a Touch of Acid for Brightness
Finish the sauce with a splash of lemon juice. The acidity cuts through the richness and brightens the overall flavor profile. Add it after the cheese has melted, and stir until the sauce is glossy. I’ve found that a teaspoon of lemon juice can transform a heavy dish into a fresh, vibrant experience.
Bake on a Rack for Even Browning
Place the baking dish on a rack in the oven. This allows air to circulate around the casserole, ensuring an even golden top. If you don’t have a rack, place a sheet of parchment paper underneath to catch drips and keep the bottom crisp.
Now that you’ve got the insider tricks, it’s time to explore how you can make this recipe your own. The next section will take you through creative twists and variations that cater to every taste preference and dietary need. Whether you’re craving something spicy, smoky, or even a bit of sweet, there’s a variation for you.
Creative Twists and Variations
Spicy Cajun Cauliflower
Swap the smoked paprika for Cajun seasoning. Add a pinch of cayenne pepper for heat and finish with chopped cilantro. This version delivers a bold, spicy kick that pairs perfectly with a cool yogurt dip.
Mushroom & Truffle Delight
Add sautéed mushrooms and a drizzle of truffle oil. The earthy mushrooms complement the creamy cheese, while the truffle oil adds a luxurious aroma. Serve with a side of garlic bread for an indulgent meal.
Bacon‑Lover’s Dream
Crumbled crispy bacon adds a savory crunch. Sprinkle the bacon over the top before baking for an extra layer of flavor. The smoky bacon pairs wonderfully with the cheesy sauce.
Herb‑Infused Green
Stir in chopped fresh parsley, basil, or thyme. The herbs brighten the dish and add a fresh, green note that balances the richness. This variation is perfect for a light summer dinner.
Low‑Fat Lightness
Use low‑fat mozzarella and skip the heavy cream. Replace the butter with a splash of olive oil and add a dash of nutritional yeast for cheesiness. The result is a lighter casserole that still delivers comfort.
Gluten‑Free Version
Swap the elbow macaroni for spiralized zucchini. Use gluten‑free breadcrumbs or crushed rice crackers for the topping. This twist keeps the dish low‑carb and gluten‑free without sacrificing flavor.
Picture yourself pulling this out of the oven, the whole kitchen smelling incredible, the golden crust shimmering like a sunrise. Each bite is a revelation—creamy, cheesy, and perfectly balanced with a satisfying crunch. Whether you’re a fan of classic comfort or an adventurous foodie, these variations will keep the dish exciting and fresh. Now, let’s talk about how to keep this casserole delicious even after it’s been stored.
Storing and Bringing It Back to Life
Fridge Storage
Cool the casserole completely before covering. Store it in an airtight container for up to 48 hours. When reheating, add a splash of milk or water to restore moisture. The result is a reheated casserole that feels almost freshly baked.
Freezer Friendly
Wrap the casserole tightly in foil and place in a freezer bag. It stays good for up to 2 weeks. Thaw overnight in the refrigerator, then bake at 375°F (190°C) for 20 minutes or until heated through. The breadcrumb topping may not be as crisp, but the flavor remains intact.
Best Reheating Method
Reheat in the oven at 350°F (175°C) for 15 minutes. This method preserves the creamy sauce and restores the crispness of the breadcrumb crust. Add a tiny splash of water before reheating to create steam, which helps the sauce regain its silky texture.
With these storage tips, you can enjoy this comfort dish anytime, whether it’s a quick weeknight dinner or a Sunday potluck. The next section will give you a ready‑to‑use recipe card so you can whip up this casserole in no time.