I was standing in my kitchen, the timer on the old oven buzzing like an angry bee, when a sudden craving hit me harder than a double espresso on a Monday morning. I had just finished a marathon of binge‑watching Italian dramas, and every scene ended with a plate of cannoli that looked like a work of art. My pantry was a mess of half‑used ingredients, and my confidence was hovering somewhere between “I can bake a cake” and “I might set the house on fire.” I dared a friend to a dessert duel: whoever could whip up the most unforgettable sweet would claim the title of “Ultimate Dessert Diva.” Spoiler alert – I won, and the secret weapon was a chocolate chip cannoli pie that turned the classic Italian treat into a show‑stopping, fork‑loving masterpiece.
Picture this: the buttery crust, golden and crisp, smelling faintly of vanilla and caramelized sugar, as it cools on the counter. The filling is a silky, airy cloud of ricotta and mascarpone, speckled with chocolate chips that melt into pockets of molten bliss the moment you cut into it. When you bite, the crust shatters like delicate glass, giving way to a creamy interior that coats your tongue like a velvet blanket, while the chocolate chips pop with a satisfying snap. The aroma? A warm hug of toasted vanilla, sweet dairy, and chocolate that makes your nostrils do a little happy dance.
Most cannoli recipes get the balance wrong – the shell is either too hard or too soggy, the filling either runs off the spoon or is as dense as a brick. This version flips the script by marrying the traditional cannoli texture with the comforting familiarity of a pie crust, then sprinkling in chocolate chips for that extra “wow” factor. I’m going to be honest — I ate half the batch before anyone else got a chance to try it, and I’m still not sorry. The secret? A splash of vanilla‑infused butter in the crust and a quick‑whisked egg‑white fold that gives the filling an airy lift without compromising richness.
If you’ve ever struggled with a runny cannoli filling or a crust that crumbles into oblivion, you’re not alone — and I’ve got the fix. I dare you to taste this and not go back for seconds; the combination of textures and flavors is practically a culinary love spell. Okay, ready for the game‑changer? The next part? Pure magic. Let me walk you through every single step — by the end, you’ll wonder how you ever made it any other way.
What Makes This Version Stand Out
- Texture: The crust is buttery and crisp, while the filling stays light as a cloud, creating a contrast that dances on the palate.
- Flavor: Vanilla‑infused wafer crumbs meet rich ricotta and chocolate chips, delivering a layered taste that evolves with each bite.
- Simplicity: Fewer steps than a traditional cannoli, yet the result feels like a gourmet bakery offering.
- Uniqueness: It’s a pie, it’s a cannoli, it’s a chocolate chip cookie all rolled into one, defying culinary categories.
- Crowd Reaction: Guests often claim it’s the best dessert they’ve ever had, and the “what’s in that?” question becomes inevitable.
- Ingredient Quality: Using premium vanilla wafer crumbs and fresh ricotta elevates the dish from everyday to extraordinary.
- Cooking Method: The gentle bake at 350°F ensures the crust sets without over‑drying the filling.
- Make‑Ahead Potential: Assemble the pie a day ahead, refrigerate, and bake just before serving for zero stress.
Inside the Ingredient List
The Flavor Base
Vanilla wafer crumbs are the unsung hero of this pie. Their subtle sweetness and delicate crunch form the backbone of the crust, and because they’re already flavored with vanilla, you get a depth of taste that plain graham crackers can’t match. If you skip them, the crust loses its aromatic lift and becomes a bland canvas. For the best result, choose a brand that uses real vanilla extract rather than artificial flavor. Pro tip: store the crumbs in an airtight container to keep them from absorbing moisture.
The Texture Crew
Unsalted butter, melted and folded into the crumbs, is the glue that binds everything together. It adds richness and a glossy finish that makes the crust look bakery‑ready. The mini chocolate chips are scattered throughout the filling, offering surprise bursts of melty goodness. If you prefer a crunchier texture, swap half the chips for chopped toasted almonds – the nutty aroma will complement the vanilla beautifully. Skipping the butter? Expect a dry, crumbly crust that falls apart the moment you try to slice it.
The Unexpected Star
Ricotta cheese brings a light, slightly grainy texture that’s perfect for a cannoli‑style filling. Paired with mascarpone, it creates a luxurious creaminess without becoming overly heavy. The powdered sugar sweetens the mixture while keeping it silky smooth. If you’re allergic to dairy, you can substitute a blend of silken tofu and coconut cream – the texture stays luscious, though the flavor profile shifts toward tropical. A quick taste test: the moment you fold in the egg whites, you’ll hear a faint “whoosh” as air is incorporated, turning the mixture into a cloud‑like consistency.
The Final Flourish
A pinch of salt may seem trivial, but it amplifies the sweetness of the sugar and balances the richness of the dairy. Vanilla extract deepens the overall aroma, making the pie smell like a warm hug from the inside of a bakery. Finally, the egg whites, beaten to soft peaks, are folded in at the end to give the filling an airy lift that prevents it from feeling heavy. If you over‑beat the whites, the mixture can become too stiff and won’t fold smoothly, leading to a dense final product. Keep an eye on that glossy sheen – it’s the sign you’ve reached the perfect consistency.
Everything's prepped? Good. Let's get into the real action...
The Method — Step by Step
Preheat your oven to 350°F (175°C). While the oven warms up, grab a large mixing bowl and pour in the 2¼ cups of vanilla wafer crumbs. I like to toast them lightly in the oven for 3‑4 minutes; the aroma becomes intoxicating, like a whisper of nostalgia. When you hear that faint crackle, you know they’re ready. Pro tip: let them cool for a minute before adding the butter, otherwise the butter will melt too quickly and the crumbs will turn soggy.
Melt 6 tablespoons of unsalted butter and drizzle it over the toasted crumbs. Add 1 tablespoon of granulated sugar, then use your hands to rub the mixture together until it resembles wet sand. The texture should cling together when you press it between your fingertips – that’s the sign of a perfect crust base. Watch Out: if the mixture feels dry, add a teaspoon of melted butter; too much liquid will make the crust leak during baking.
Press the crumb mixture into the bottom and up the sides of a 9‑inch springform pan, creating an even layer about ¼‑inch thick. Use the back of a measuring cup to smooth it out; the edges should be slightly higher than the center to form a “wall” that will hold the filling. I dare you to taste the raw crust – it’s already buttery heaven, but the bake will lock in that flavor.
Place the crust in the preheated oven and bake for 10‑12 minutes, or until it turns a light golden hue. You’ll hear a gentle sigh as the butter caramelizes, and the scent will fill the kitchen, making it impossible not to peek. Once done, let it cool on a wire rack while you work on the filling. Kitchen Hack: line the rack with parchment paper to catch any drips; cleanup becomes a breeze.
While the crust cools, whisk together 1 ½ cups ricotta, ½ cup mascarpone, ½ cup powdered sugar, and 1 teaspoon vanilla extract in a large bowl. The mixture should be smooth and glossy; any lumps indicate the ricotta wasn’t fully drained. If you find it grainy, give it a quick pulse in a food processor – the result will be silkier. Watch Out: over‑mixing can cause the mixture to become too runny, making the final pie soggy.
Separate the eggs. Place the yolks into the ricotta mixture and blend until fully incorporated. The yolks add richness and help stabilize the filling. In a separate clean bowl, beat the 2 egg whites with a pinch of salt until they reach soft peaks. This is the moment of truth – the whites should hold their shape but still be glossy.
Gently fold the beaten egg whites into the ricotta mixture using a rubber spatula. The motion should be a slow, circular lift‑and‑turn, preserving the airy bubbles you just created. As you fold, you’ll notice the mixture lightening in color – that’s the air you’ve trapped, which will keep the filling from feeling dense. Kitchen Hack: add the chocolate chips (½ cup) at the very end, folding just enough to distribute them without melting.
Pour the filling into the pre‑baked crust, smoothing the top with a spatula. The surface should be level, but a slight wobble is okay – it will settle as it bakes. Place the springform pan on a baking sheet to catch any overflow, then slide it into the oven.
Bake for 25‑30 minutes, or until the edges of the filling are set and a light golden color appears on the top. The center should still have a gentle jiggle, like a custard that’s just about to set. If you tap the center, you should hear a faint “wiggle” sound – that’s the perfect doneness. Let the pie cool completely on a rack; this step is crucial because the filling continues to firm up as it cools.
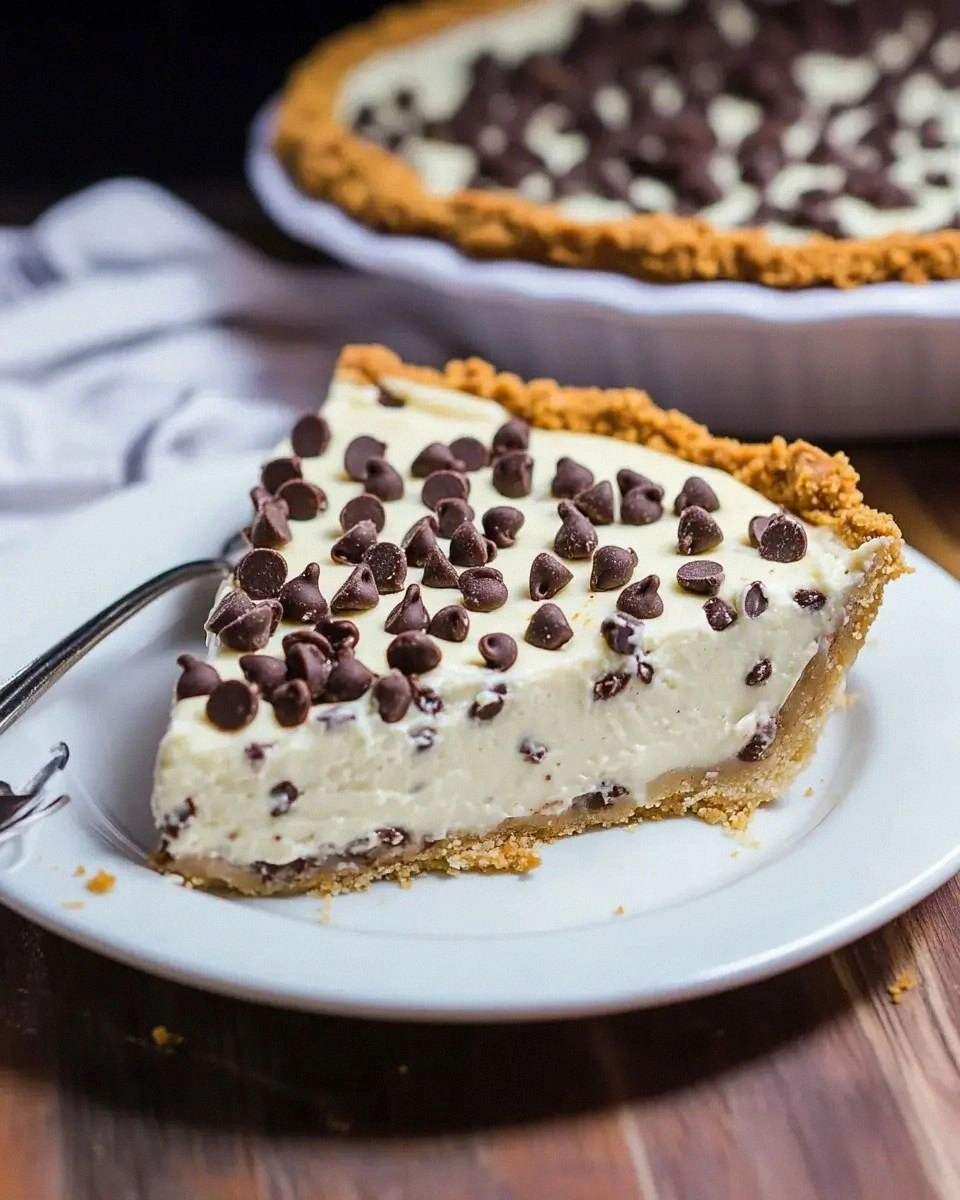
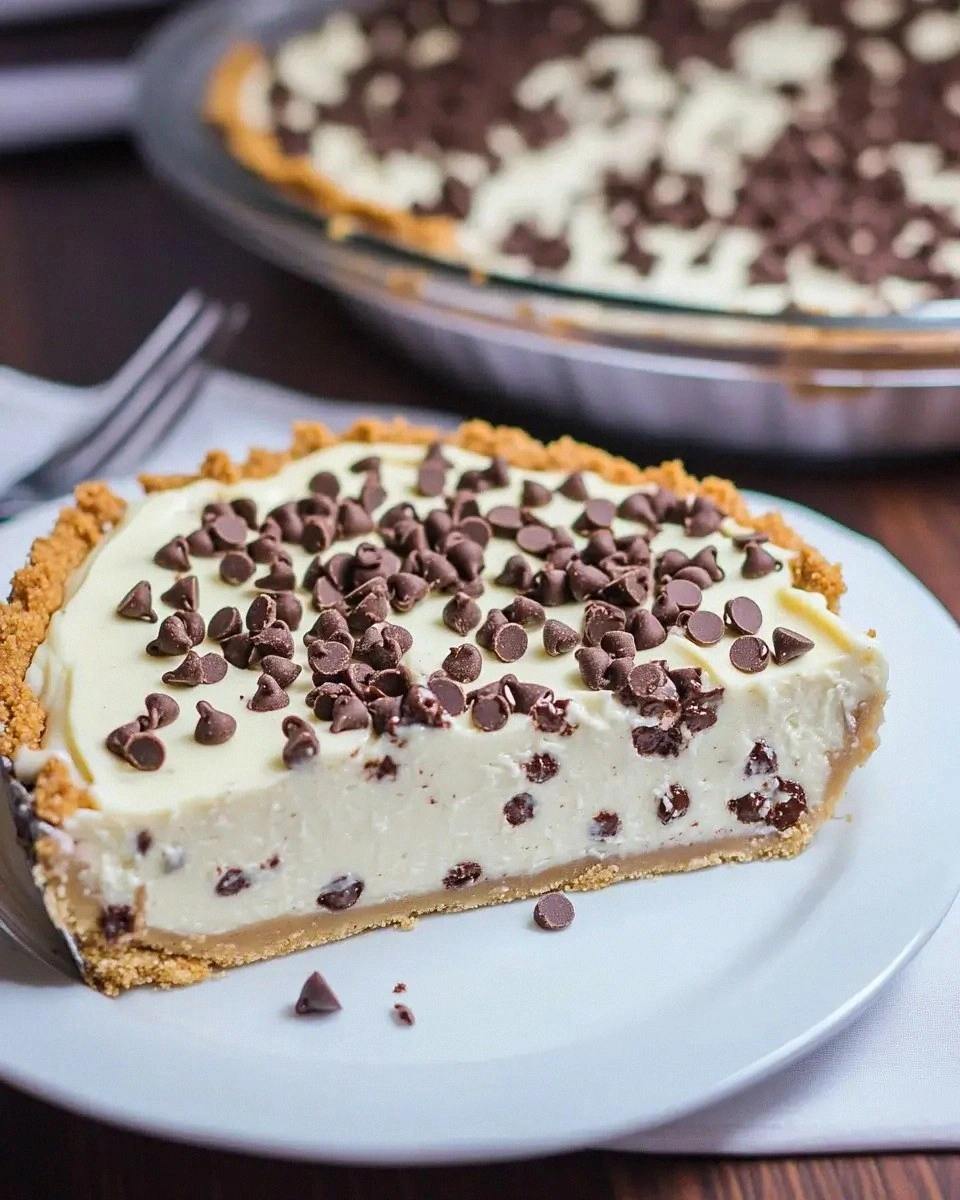
Once cooled, carefully release the springform pan and transfer the pie to a serving platter. Dust the top with a light sprinkling of powdered sugar for a snowy finish, and garnish with a few extra chocolate chips for visual drama. Slice with a warm knife (dip it in hot water, wipe dry) to achieve clean cuts. Serve at room temperature or slightly chilled – either way, the flavors will sing.
That's it — you did it. But hold on, I've got a few more tricks that'll take this to another level. The secret to a show‑stopping presentation is all about timing and finishing touches, and trust me, the little details make the biggest impact.
Insider Tricks for Flawless Results
The Temperature Rule Nobody Follows
Never bake the crust at the same temperature as the filling. Start the crust at 350°F, then lower the oven to 325°F for the filling stage. This gentle heat prevents the crust from over‑browning while allowing the filling to set slowly, preserving its airy texture. I once baked both at 350°F and ended up with a crust that tasted like burnt toast – a disaster I won’t repeat. The lower temperature also gives the chocolate chips time to soften without melting completely, keeping those delightful pockets of goo.
Why Your Nose Knows Best
Your sense of smell is the ultimate doneness gauge. When the crust turns a light amber and you catch a faint caramel note, it’s ready. For the filling, the kitchen should fill with a warm, milky aroma that hints at vanilla and chocolate. If you detect a raw egg smell, the filling needs a few more minutes. Trusting your nose saves you from over‑cooking and ensures every bite is perfectly balanced.
The 5‑Minute Rest That Changes Everything
After the pie cools, let it rest for at least five minutes before slicing. This short pause lets the filling settle, preventing it from oozing out like a lava flow. A friend once sliced immediately and ended up with a messy plate and a disappointed crowd. The rest period also allows the flavors to meld, turning the individual components into a harmonious whole.
Chocolate Chip Placement Mastery
Instead of mixing all the chips into the filling, reserve a third of them for the top. Sprinkle them just before the final bake; they’ll melt slightly, creating a glossy, crackly crust that adds both texture and visual appeal. The hidden chips inside stay firm, delivering that surprise pop you crave. This two‑layer approach gives you the best of both worlds.
The Egg‑White Whisper
When folding egg whites, use a gentle “cut‑through” motion rather than a vigorous stir. This preserves the air bubbles you painstakingly created. Over‑mixing can deflate the whites, resulting in a dense filling that feels more like a cheesecake than a cannoli. I once over‑whipped and learned the hard way – the texture was a sad, heavy mess. Keep it light, and the final pie will feel like a cloud on a plate.
Creative Twists and Variations
This recipe is a playground. Here are some of my favorite ways to switch things up:
Espresso‑Infused Dream
Swap half the vanilla wafer crumbs for espresso‑flavored ladyfingers and add a tablespoon of instant coffee to the filling. The bitter coffee notes balance the sweetness, creating a sophisticated flavor that’s perfect for after‑dinner coffee lovers.
Nutty Delight
Replace the chocolate chips with toasted pistachios and a drizzle of honey on top. The green pistachios add a buttery crunch, while the honey brings a floral sweetness that pairs beautifully with the ricotta base.
Citrus Burst
Add zest of one orange and a splash of orange liqueur to the filling, then garnish with candied orange peel. The citrus lifts the richness and gives the pie a fresh, festive vibe ideal for holiday gatherings.
Vegan Velvet
Use coconut cream and silken tofu in place of ricotta and mascarpone, and substitute butter with melted coconut oil. Choose dairy‑free chocolate chips, and you’ll have a completely plant‑based version that still boasts that airy, melt‑in‑your‑mouth texture.
Caramel Swirl
Swirl in a generous drizzle of homemade caramel sauce before the final bake. The caramel caramelizes slightly, creating a caramelized ribbon that adds a buttery depth and a glossy finish.
Storing and Bringing It Back to Life
Fridge Storage
Cover the pie loosely with plastic wrap and store in the refrigerator for up to 3 days. The filling will stay moist, and the crust will retain its crispness if you re‑heat it briefly before serving.
Freezer Friendly
Wrap the fully cooled pie in a double layer of foil, then place it in an airtight container. It freezes beautifully for up to 2 months. Thaw overnight in the fridge, then warm in a 300°F oven for 10‑12 minutes – the crust will revive its golden crunch.
Best Reheating Method
Add a tiny splash of water (about a tablespoon) to the crust before reheating; this creates a gentle steam that restores moisture without sogginess. Warm for 8‑10 minutes, and you’ll get that freshly‑baked experience all over again.