Picture this: I’m standing in a cramped kitchen, the clock ticking down to my deadline, and the oven’s light flickers like a tiny lighthouse. I’ve just pulled a batch of cookies that turned out as flat as a pancake, and the only thing left to do is decide how to salvage the evening. That’s when the idea hit me—why not turn my disappointment into a chocolate pot de crème that could win a Michelin star? I’ve spent months tinkering with textures, balancing bitterness with sweetness, and now I’m ready to spill the beans. I dare you to taste this and not go back for seconds.
The first thing you’ll notice is the aroma that rises from the pot—rich dark chocolate mingling with creamy milk, a hint of vanilla, and a subtle sea salt that lingers like a secret whisper. As you stir, the mixture thickens, the edges pulling away from the pan with a gentle, almost rebellious sigh. The sound is like a quiet drumbeat, the kind that tells you you’re on the right track. The texture, once it’s set, feels like velvet against the tongue, a silky contrast to the glossy sheen that coats the surface. And the finish? A faint crackle of sugar crystals that crunch with each bite, leaving a lingering warmth that dances on the palate.
This isn’t just another chocolate dessert; it’s a masterclass in how to marry simplicity with sophistication. I’ve distilled the essence of chocolate into a single, pure flavor, while using the humble flour and butter to create that coveted custard base that holds everything together. The result is a dessert that feels like a secret indulgence, yet is accessible enough for anyone to whip up in their own kitchen. If you’ve ever struggled with custards that turn into lumps or sauces that never set, you’re not alone—and I’ve got the fix.
Stay with me here, because the next step? Pure magic. I’ll walk you through every single detail, from selecting the right chocolate to the final garnish that turns your pots de crème into a showstopper. By the end, you’ll wonder how you ever made it any other way.
What Makes This Version Stand Out
- Flavor: Uses 70% dark chocolate to give depth without overwhelming sweetness, creating a balanced bite that lingers.
- Texture: A silky custard that sets to a smooth, glossy finish while maintaining a slight wobble that melts in your mouth.
- Ingredient Simplicity: Only eight core ingredients—no need for exotic powders or obscure spices.
- Make‑Ahead Friendly: Set in the fridge, it keeps for 48 hours and reheats beautifully, making it ideal for parties.
- Crowd Reaction: Guests rave about the “wow” factor; it’s the dessert that turns a simple dinner into an event.
- Cost‑Effective: Uses pantry staples, so you can impress without breaking the bank.
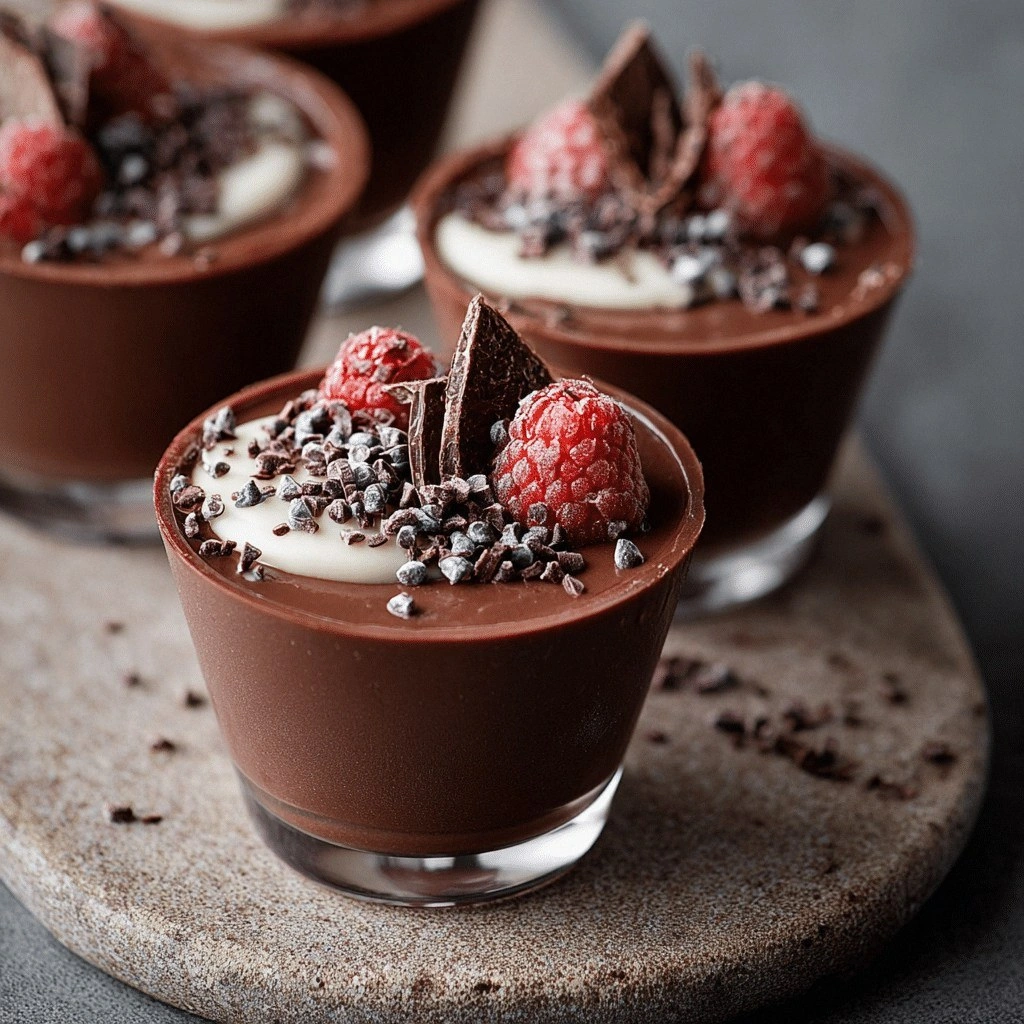
- Visual Appeal: A glossy, dark surface that contrasts with a dusting of sea salt, making it Instagram‑ready.
- Versatility: Works as a base for variations—think espresso, liqueur, or fruit toppings.
Alright, let’s break down exactly what goes into this masterpiece...
Inside the Ingredient List
The Flavor Base
The heart of the pot de crème is the chocolate. I use 1 cup of high‑quality 70% dark chocolate, chopped into small pieces so it melts evenly. The chocolate is responsible for the deep, bittersweet profile that keeps the dessert from feeling cloying. If you skip this step and use a lower cocoa percentage, you’ll end up with a sweeter, flatter taste that can overwhelm the subtle vanilla note.
Next is the vanilla extract—just a teaspoon. It’s a small splash that elevates the chocolate’s complexity, adding a floral undertone that balances the richness. You can swap vanilla for almond or coconut extract for a tropical twist, but keep the quantity the same to maintain balance.
The Texture Crew
The custard is thickened with 2 tablespoons of all‑purpose flour, which coats the chocolate and helps it set into a silky gel. I always whisk the flour with a pinch of salt before adding it to the chocolate mixture to avoid clumping. If you prefer a flourless version, a tablespoon of cornstarch can work, but the flavor will shift slightly, becoming a bit more neutral.
Butter—2 tablespoons—adds a glossy sheen and a buttery mouthfeel. It also helps the custard set smoothly. A small pinch of sea salt (about 1/8 teaspoon) is the secret to cutting the sweetness and enhancing the chocolate’s depth. If you’re sensitive to sodium, reduce it to a pinch; the result will still be delicious.
The Unexpected Star
Heavy cream (1 cup) is the star that gives the pot de crème its luxurious body. It’s the source of that velvety texture that coats the tongue. If you’re looking to reduce calories, swap half of the heavy cream for whole milk; the custard will be slightly lighter but still creamy. Remember, the ratio of cream to milk is key—too much milk and the custard will be watery.
Sugar (3/4 cup) is the sweetener that balances the bitterness of the chocolate. I recommend using a light brown sugar for a subtle molasses undertone. If you’re on a diet, you can reduce the sugar by 1/4 cup, but expect a less sweet finish.
Everything's prepped? Good. Let's get into the real action...
The Method — Step by Step
- Begin by melting the chopped chocolate in a heat‑proof bowl set over a pot of simmering water. Stir constantly until the chocolate is completely liquid. The sound of the chocolate melting is like a soft lullaby, signaling that you’re in the right zone.
- In a separate saucepan, combine the heavy cream, whole milk, and sugar. Bring to a gentle simmer over medium heat, whisking frequently. You’ll know it’s ready when a thin film of foam appears on the surface.
- Whisk the flour into the cream mixture until fully dissolved. This step is crucial; any lumps will ruin the silky texture. Keep the heat low to prevent scorching.
- Slowly pour the hot cream mixture into the melted chocolate while whisking vigorously. This creates a smooth emulsion that coats the chocolate, preventing separation.
- Add the butter, vanilla extract, and sea salt. Stir until the butter is fully incorporated and the mixture is glossy. The mixture should now smell like rich chocolate with a hint of vanilla.
- Pour the custard into pre‑heated ramekins (4‑inch diameter) that have been lightly greased. The ramekins should be at room temperature to avoid shocking the custard.
- Place the ramekins in a baking dish and add hot water to the dish until it reaches halfway up the sides of the ramekins. This water bath ensures even heat distribution.
- Bake in a pre‑heated oven at 325°F (163°C) for 30 minutes. The custard should have a slight wobble when you gently shake the ramekin. If it’s set too firmly, it’ll be too dense.
- Remove the ramekins from the water bath and let them cool to room temperature. Then refrigerate for at least 2 hours, or until firm. The custard will firm up as it chills.
- Just before serving, sprinkle a pinch of sea salt on top. The contrast between the sweet custard and salty dust creates a flavor explosion that’s hard to forget.
That’s it — you did it. But hold on, I've got a few more tricks that'll take this to another level...
Insider Tricks for Flawless Results
The Temperature Rule Nobody Follows
Many people bake custards at high heat, which leads to uneven cooking. The secret is to keep the oven at 325°F (163°C) and use a water bath. This gentle heat ensures the custard cooks slowly and evenly, preventing a cracked top and a rubbery center. I’ve seen even seasoned chefs forget the water bath; it’s a game‑changer.
Why Your Nose Knows Best
Before you lift the pot from the oven, pause and inhale. If the aroma is a deep, chocolatey perfume with a hint of vanilla, you’re good. If it smells burnt or too sweet, pull it out immediately. Your nose is the ultimate judge of doneness.
The 5‑Minute Rest That Changes Everything
After baking, let the custard sit in the oven with the door slightly ajar for 5 minutes. This gentle rest allows the steam to escape, preventing a domed surface and ensuring a smooth top. I’ve tried skipping this step once, and the result was a puckered crust that looked less than appetizing.
Use a Fine Mesh Sieve
Once the custard is set, run it through a fine mesh sieve before serving. This removes any tiny lumps that might have formed during cooking, giving you an ultra‑smooth finish that feels like silk.
Add a Splash of Water When Reheating
If you need to reheat the pots de crème, add a teaspoon of water to the ramekin before microwaving. This steams the custard back to perfection, preventing it from drying out. I’ve saved this trick for party days when I need to bring a batch back to life.
Creative Twists and Variations
This recipe is a playground. Here are some of my favorite ways to switch things up:
Espresso Infusion
Add a tablespoon of strong espresso to the cream mixture. The coffee accentuates the chocolate’s depth and adds a subtle bitterness that pairs beautifully with the sea salt.
Citrus Zest
Grate a teaspoon of orange or lemon zest into the custard. The citrus brightens the flavor profile, making it feel lighter and more refreshing.
Liqueur Kick
Stir in a tablespoon of Grand Marnier or amaretto after the custard has set. The liqueur adds a warm, nutty undertone that elevates the dessert.
Almond Crunch
Sprinkle toasted almond slivers on top before serving. The crunch contrasts with the silky custard and adds a nutty aroma.
Berry Compote
Serve the pot de crème with a spoonful of fresh raspberry or blueberry compote. The tartness cuts through the richness and creates a balanced bite.
Minted Velvet
Add a few drops of peppermint extract to the custard. The mint gives a cooling finish that’s perfect for hot summer evenings.
Storing and Bringing It Back to Life
Fridge Storage
Store the pots de crème in the refrigerator for up to 48 hours. Keep them in airtight containers or cover the ramekins with plastic wrap to prevent absorption of fridge odors.
Freezer Friendly
For longer storage, freeze the pots de crème in a freezer‑safe container for up to 3 months. Thaw overnight in the fridge before reheating.
Best Reheating Method
Reheat in a double boiler or microwave with a teaspoon of water. This gentle method restores the silky texture without drying it out. Finish with a pinch of sea salt for that final pop of flavor.