I remember the night I almost burned the kitchen down while chasing the perfect fudge. My stovetop was a battlefield of melted butter, sugar, and a frantic timer that seemed to tick in a different universe. The air was thick with the scent of caramelized sugar and toasted butter, a smell that made my mouth water even before I tasted the first bite. It was a disaster—fluffy sugar clumps, a pan that sputtered, and my own impatience threatening to turn the kitchen into a ruinous mess. But from that chaos rose a revelation: the secret to a silky, buttery fudge lies not just in the ingredients, but in the way you brown the butter.
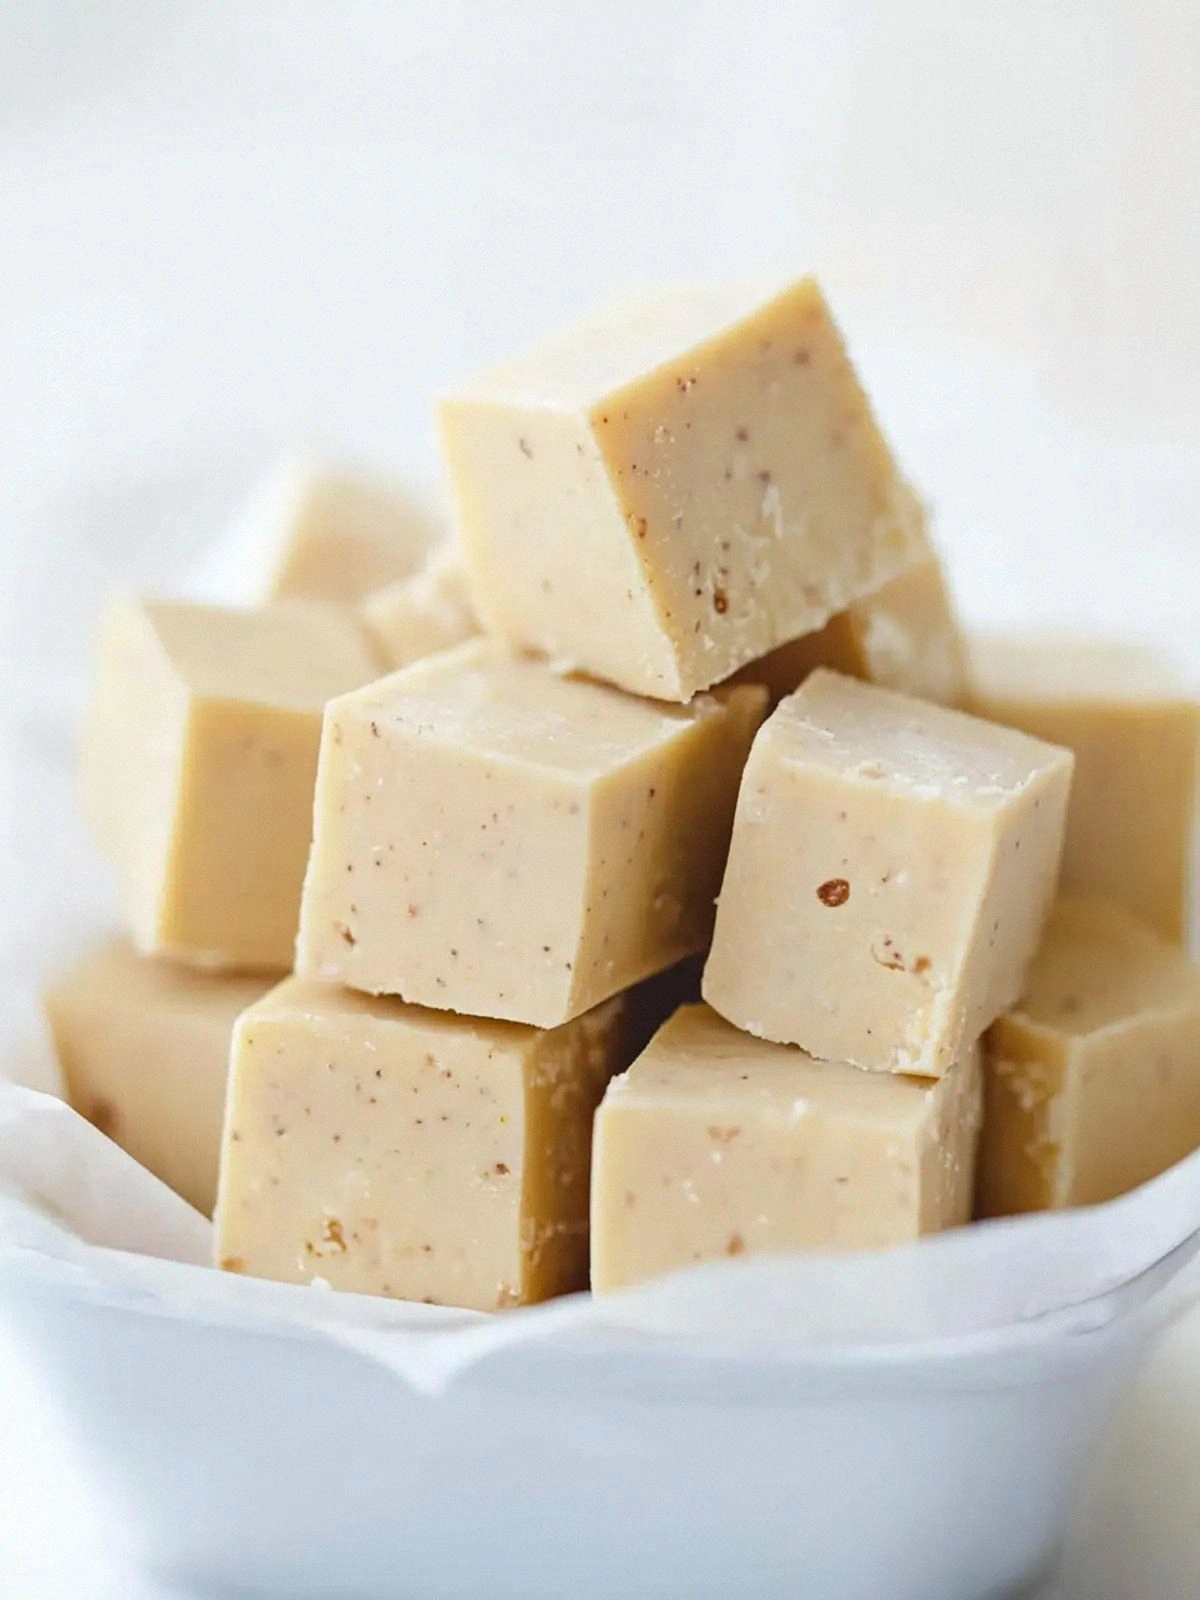
Picture yourself pulling this out of the oven, the whole kitchen smelling incredible, the fudge shimmering like a polished amber slab. The first bite melts on your tongue, a cascade of sweet, buttery, chocolatey bliss that feels like a hug in a bite. I dare you to taste this and not go back for seconds. The texture is a paradox—firm enough to hold a bite but silky enough to slide off your spoon. This is hands down the best version you'll ever make at home, and I'm about to walk you through every single step—by the end, you'll wonder how you ever made it any other way.
Most recipes get this completely wrong, focusing on the sugar and chocolate while forgetting the heart of the fudge: browned butter. When butter is heated until it turns golden and emits that nutty aroma, it transforms ordinary sugar into a caramelized dream. The butter’s subtle toasted notes become the backbone of the fudge, giving it depth and a buttery finish that simple melted butter never achieves. The result? A fudge that feels like a caramelized candy bar, but with the rich, indulgent mouthfeel of chocolate. If you've ever struggled with fudgy textures or bland flavors, you're not alone—this tweak fixes everything.
What Makes This Version Stand Out
This recipe is a masterclass in flavor, texture, and convenience. Here’s why it rises above the rest:
- Taste: The browned butter introduces a nutty, caramel undertone that elevates the sweetness of the sugar and the richness of the white chocolate.
- Texture: The combination of marshmallow fluff and evaporated milk creates a silky, almost liquid consistency that sets as a firm yet melt-in-your-mouth slab.
- Simplicity: No complicated equipment, just a saucepan, a whisk, and a few pantry staples.
- Uniqueness: The use of marshmallow fluff gives the fudge a playful, cloud-like lightness that most traditional fudges lack.
- Crowd Reaction: At parties, guests often comment that this fudge tastes like a “chocolate caramel bar” with a secret twist.
- Ingredient Quality: Using high‑grade white chocolate chips and unsalted butter ensures the best flavor profile.
- Cooking Method: Browning butter is a low‑risk, high‑reward technique that many overlook.
- Make‑ahead Potential: Once set, the fudge keeps well in the fridge or freezer, making it a perfect make‑ahead dessert.
Alright, let's break down exactly what goes into this masterpiece…
Inside the Ingredient List
Let’s dissect the components that make this fudge a triumph. Each ingredient plays a distinct role, and understanding those roles helps you tweak the recipe to your taste.
The Flavor Base
¾ cup unsalted butter is the star of the show. When browned, it releases a nutty aroma that permeates the entire batch. Skipping this step results in a flat, syrupy fudge that lacks depth. If you’re allergic to dairy, try using a non‑dairy butter alternative, but keep in mind the flavor shift.
The Texture Crew
3 cups granulated sugar provides the bulk of the sweetness and the body of the fudge. ⅔ cup evaporated milk adds moisture and helps the fudge set into a firm yet pliable consistency. Together, they create a smooth, velvety mouthfeel. If you prefer a slightly drier texture, reduce the evaporated milk by one tablespoon.
The Unexpected Star
2 cups white chocolate chips are the secret to that silky, bright finish. White chocolate melts smoothly, blending with the butter to create a cohesive flavor profile. Swap them for milk chocolate chips for a richer, more complex taste, but expect a darker color and a different mouthfeel.
The Final Flourish
1 jar (7 ounces) marshmallow fluff gives the fudge a light, airy texture that contrasts the dense chocolate. It also acts as a binder, ensuring the fudge holds together. If you’re watching calories, you can replace half the marshmallow fluff with a light whipped topping, but the texture will change.
1 teaspoon vanilla extract rounds out the flavor, adding a subtle warmth that balances the sweetness. If you’re experimenting, a pinch of sea salt can enhance the chocolate notes, but use sparingly.
Everything's prepped? Good. Let's get into the real action…
The Method — Step by Step
Okay, ready for the game‑changer? This next part is pure magic. Follow these steps closely, and you’ll produce a fudge that melts on your tongue and stays firm enough for slicing.
- Place the butter in a heavy‑bottomed saucepan over medium heat. Stir constantly until the butter melts and begins to foam. Watch the color shift from pale yellow to a warm amber—this is the moment of truth. The butter should emit a nutty aroma; if it smells like burnt, lower the heat immediately.
- Add the granulated sugar to the browned butter, whisking until the mixture turns a translucent, caramel‑like hue. The sugar will dissolve into the butter, creating a glossy base. Keep the heat at medium; too high and the sugar will burn, too low and it won’t dissolve evenly.
- Pour in the evaporated milk, stirring continuously. The mixture will begin to thicken and bubble gently. If it starts to froth excessively, reduce the heat to low. The goal is a smooth, glossy sauce.
- Lower the heat to low and let the sauce simmer for 5 minutes, stirring occasionally. The mixture should thicken to a custard‑like consistency. A good test: take a spoonful and let it cool slightly; it should hold its shape without sliding.
- Remove the pan from the heat and stir in the white chocolate chips. The chips will melt instantly, blending into a smooth, glossy sauce. Allow the mixture to cool for 2 minutes; this reduces the temperature so the marshmallow fluff won’t melt too quickly.
- Add the marshmallow fluff and vanilla extract. Stir until the fluff is fully incorporated and the mixture is smooth. The marshmallow will give the fudge a light, airy texture that sets beautifully.
- Transfer the mixture to a greased 8‑inch square pan. Press it down firmly with a spatula to eliminate air pockets. Let it cool at room temperature for 30 minutes, then refrigerate for at least 2 hours to set.
That’s it— you did it. But hold on, I've got a few more tricks that'll take this to another level…
Insider Tricks for Flawless Results
I’ve been making fudge for years, and a few small adjustments can elevate it from good to legendary. Here are the tricks that most people overlook.
The Temperature Rule Nobody Follows
Heat is the silent architect of texture. Keep the butter at a steady medium heat; a sudden spike can cause the sugar to crystallize. A thermometer is your best friend—aim for 350°F (175°C). If the mixture starts to smoke, reduce the heat immediately. Consistency in temperature ensures a silky, smooth finish.
Why Your Nose Knows Best
Smell is a powerful indicator of doneness. When the butter turns amber, a nutty aroma will dominate. If it starts to smell burnt or metallic, the mixture is over‑cooked. Trust your nose; a well‑browned butter gives the fudge its signature depth.
The 5‑Minute Rest That Changes Everything
After adding the white chocolate chips, give the mixture a 5‑minute rest off the heat. This allows the chocolate to melt fully without overheating, preventing separation. The rest also lets the mixture cool slightly, so the marshmallow fluff stays light and airy. A quick pause can make a big difference.
The Perfect Pan Choice
A non‑stick or well‑lined pan is essential. The fudge sets quickly, and a slick surface ensures a clean release. If you’re using a glass pan, avoid the edges; the fudge may stick there. A silicone mat works wonders for easy removal.
The Secret of the Marshmallow
Marshmallow fluff is a game‑changer. It introduces air and lightness, preventing the fudge from becoming too dense. Use a fresh jar; older fluff can lose its fluffiness and turn sticky. If you can’t find marshmallow fluff, a light whipped topping will work, but the texture will shift.
Creative Twists and Variations
This recipe is a playground. Here are some of my favorite ways to switch things up:
Salted Caramel Fudge
Add a pinch of sea salt to the mixture before adding the chocolate chips. The salt balances the sweetness and gives a subtle crunch. It’s perfect for a sophisticated dessert that still feels indulgent.
Nutty Crunch Fudge
Fold in ½ cup chopped toasted almonds or pecans after the chocolate has melted. The nuts add a satisfying crunch and a nutty flavor that pairs beautifully with the browned butter. Sprinkle a little sea salt on top for extra depth.
Coffee‑Infused Delight
Stir in 1 teaspoon instant espresso powder with the vanilla extract. The coffee enhances the chocolate notes and adds a subtle bitterness that balances the sweetness. It’s a great choice for coffee lovers who want a richer flavor profile.
Coconut‑Lemon Twist
Replace the marshmallow fluff with ½ cup shredded coconut and 1 tablespoon lemon zest. The coconut adds a tropical texture, while the lemon zest brightens the flavor. The result is a refreshing, slightly tart fudge that’s perfect for summer.
Dark Chocolate Variation
Swap the white chocolate chips for dark chocolate chips, using the same quantity. The dark chocolate gives a richer, more complex flavor. Pair it with a splash of orange liqueur for an extra layer of depth.
Low‑Sugar Version
Use a sugar substitute that measures like granulated sugar, such as erythritol or monk fruit sweetener. The fudge will have a slightly different texture, but the browned butter and marshmallow fluff keep it delicious. It’s a great option for those watching their sugar intake.
Storing and Bringing It Back to Life
A good fudge can last a long time if stored properly. Here’s how to keep it fresh and restore its original texture.
Fridge Storage
Wrap the fudge tightly in plastic wrap or store it in an airtight container. It will keep for up to two weeks in the refrigerator. For the best flavor, let it sit at room temperature for 10 minutes before serving.
Freezer Friendly
Freeze the fudge in a single layer on a parchment‑lined tray, then transfer it to a freezer bag. It will stay good for up to three months. When ready to serve, let it thaw at room temperature for 30 minutes.
Best Reheating Method
If the fudge becomes too hard, place a small portion in a microwave‑safe bowl and heat on low for 10–15 seconds. Add a tiny splash of water before reheating; it steams back to perfection. Stir gently to redistribute the melted chocolate.