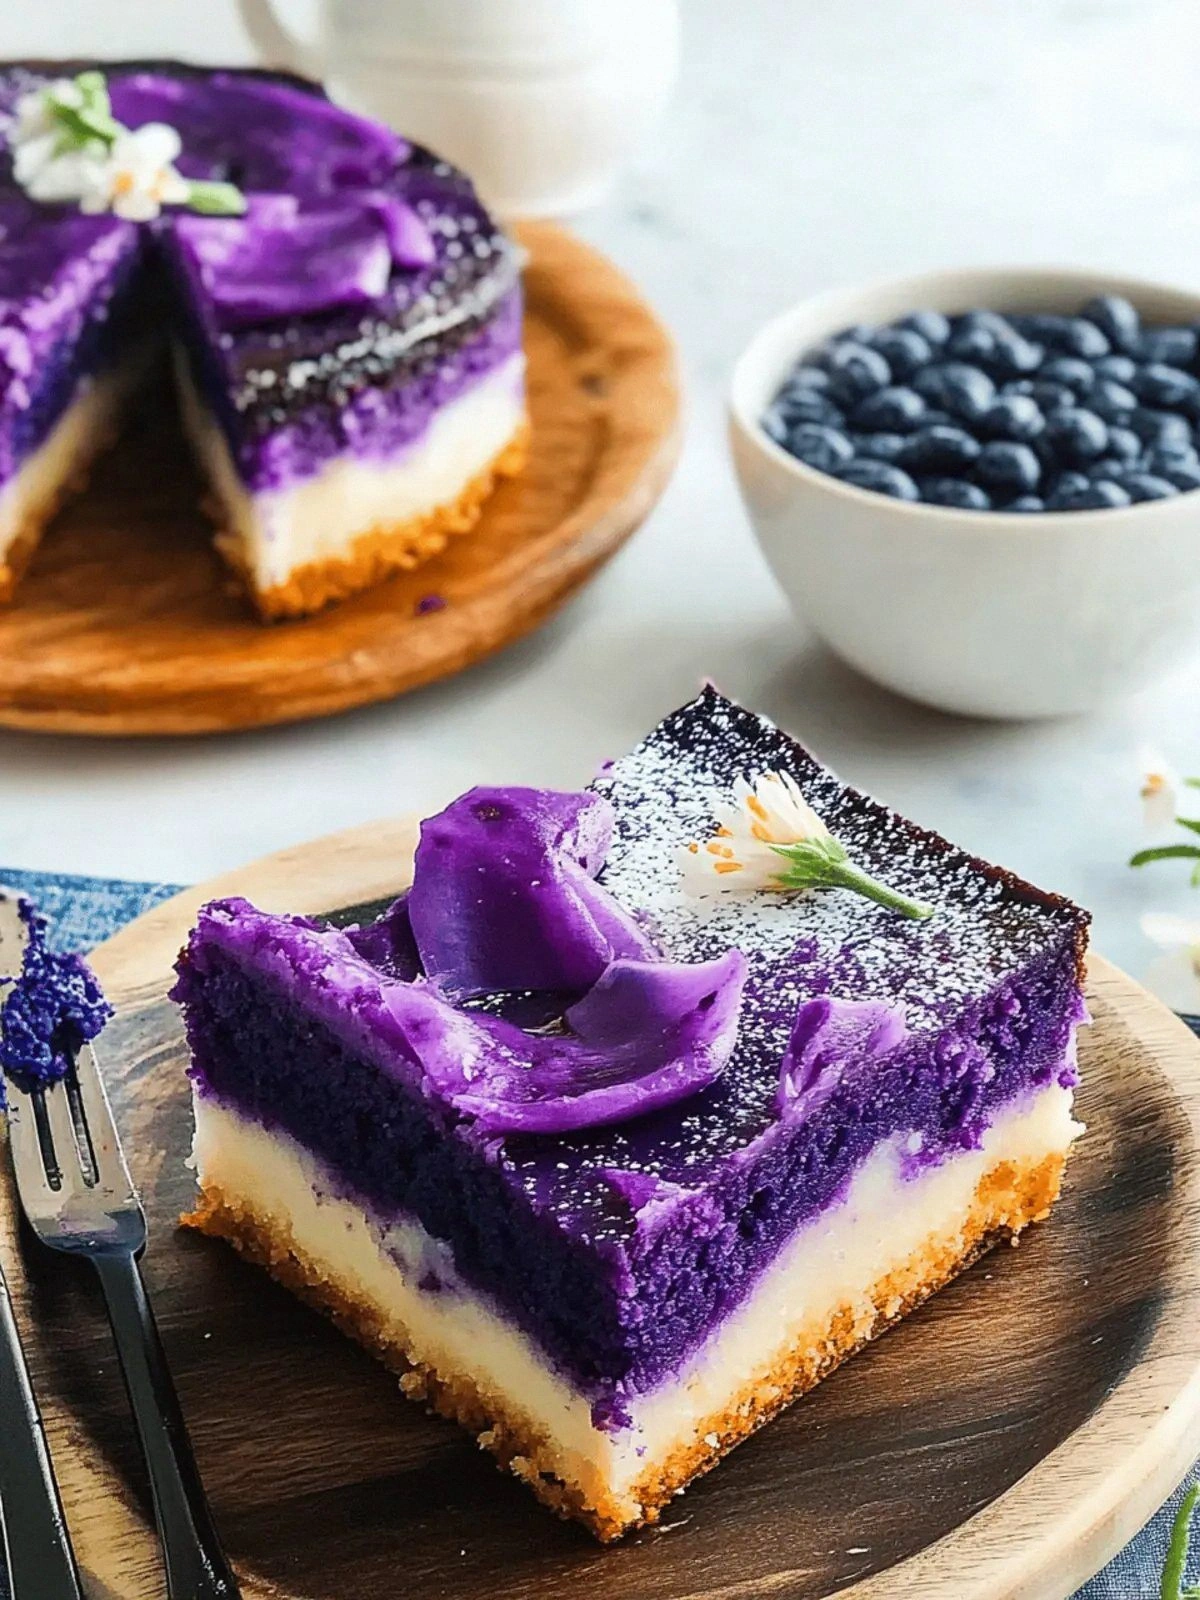
Picture this: I was scrambling to salvage a last‑minute dessert for a friends’ gathering, and the only thing I had on hand was a tub of ube halaya and a bag of grated cassava. I thought, why not mash them together and see what happens? The result was a vibrant, silky cake that melted in your mouth like a tropical sunrise. My friends were instantly hooked, and I felt a spark of culinary genius. This kitchen disaster turned into a revelation, and I’m here to share the secret.
Now, if you’re wondering whether this is just another ube cake, let me drop a truth bomb: this is hands down the best version you’ll ever make at home. I dare you to taste this and not go back for seconds because the layers of sweet coconut and creamy ube will have you humming. The texture is a buttery cloud that clings to the fork, not a sticky mush. I’ve tried countless variations, and none matched this balance of flavor and mouthfeel. So buckle up; we’re about to dive into the recipe that will change your dessert game.
I’ll be honest — I ate half the batch before anyone else got to try it. Most recipes get this completely wrong, using too much sugar or too little ube, but here we keep the sweet harmony intact. The secret lies in the ratio of coconut milk to evaporated milk, which gives that silky sheen. Contrast that with the humble cassava, which brings a subtle earthiness that anchors the sweetness. Together they create a cake that feels both exotic and comforting.
Picture yourself pulling this out of the oven, the whole kitchen smelling incredible, steam curling up like a sweet cloud. The golden top will crackle as it cools, revealing a glossy finish that glistens like a jewel. I promise you, the first bite will transport you to a tropical island, even if you’re stuck in a city apartment. Let me walk you through every single step — by the end, you’ll wonder how you ever made it any other way. Trust me, this is the dessert that will have your guests begging for the recipe.
What Makes This Version Stand Out
- Taste: The harmony of ube, coconut, and a hint of vanilla creates a flavor profile that feels both nostalgic and adventurous. The natural sweetness of the ube halaya is balanced by the subtle saltiness of the salted butter, ensuring every bite is layered.
- Texture: This cake boasts a moist crumb that melts on the tongue, thanks to the combination of grated cassava and coconut milk. The macapuno strings add a chewy surprise that contrasts beautifully with the silky base.
- Simplicity: With only fourteen ingredients, the recipe stays approachable for beginners yet delivers a professional finish. The method requires no fancy equipment—just a mixing bowl and a baking pan.
- Uniqueness: Few desserts combine cassava, ube, and macapuno in a single cake, making this a standout treat that showcases Filipino flavors in a new light.
- Crowd Reaction: At every gathering, the cake becomes the centerpiece, with guests asking for the recipe after the first bite. The vibrant color alone draws attention, while the taste delivers on the promise.
- Ingredient Quality: Using fresh, high‑quality ube halaya and fresh cassava ensures a natural, unprocessed flavor that sets this recipe apart from store‑bought versions.
- Make‑Ahead Potential: The cake can be baked ahead of time, refrigerated, and reheated with minimal loss of texture. This makes it ideal for parties and special occasions.
Inside the Ingredient List
The Flavor Base
At the heart of this cake lies the marriage of grated cassava and ube halaya. The cassava provides a neutral, slightly earthy canvas that absorbs the sweet ube, while the ube halaya injects a deep purple color and a mellow, sweet flavor. If you find your ube halaya too thick, add a splash of coconut milk to loosen it. Swapping ube halaya for fresh ube puree will give a fresher, slightly tart edge, but you’ll need to adjust the sugar accordingly.
The Texture Crew
Macapuno strings are the secret chewy element that elevates the cake’s mouthfeel. They’re made from fresh coconut flesh, giving a subtle coconut flavor and a satisfying bite. If macapuno isn’t available, coconut flakes can work, though they’ll be crunchier. A small pinch of salt is added to the batter to enhance the overall sweetness without overpowering the coconut notes.
The Unexpected Star
All‑purpose flour may seem out of place, but it stabilizes the batter and gives the cake a tender crumb. A light dusting of flour also helps the batter set without becoming dense. For a gluten‑free version, swap the flour with an equal amount of rice flour or a gluten‑free blend; the texture will be slightly different but still delicious.
The Final Flourish
Butter, both salted and unsalted, adds richness and depth of flavor. The unsalted butter melts into the batter, creating a silky mouthfeel, while the salted butter introduces a subtle savory note that balances the sweetness. Vanilla extract ties all the flavors together, giving a warm, aromatic finish. If you prefer a more pronounced vanilla flavor, double the amount of vanilla extract.
Everything's prepped? Good. Let's get into the real action...
The Method — Step by Step
- Preheat the oven to 350°F (175°C). Grease a 9-inch square baking pan with butter and lightly dust with flour, tapping out excess. Place the pan on a middle rack so the heat circulates evenly. The oven should be fully preheated before you put the batter in; this ensures a consistent rise. I’ve seen cakes that stay flat because the oven was too cool, so make sure the temperature is right.
- Combine the cassava and ube. In a large mixing bowl, mash the grated cassava with a fork until it’s almost smooth. Fold in the ube halaya until the mixture turns a uniform, deep violet hue. The batter should look like a thick, creamy pudding. If it feels too thick, add a tablespoon of coconut milk to loosen it. This step is crucial for that silky texture.
- Blend in the liquids. Pour in the coconut milk, evaporated milk, and condensed milk, stirring until the batter is glossy and well‑combined. Add the eggs one at a time, beating after each addition to ensure they’re fully incorporated. The batter should be thick but pourable. The eggs give structure, while the milks add richness.
- Incorporate the dry ingredients. Add the all‑purpose flour, ube extract, vanilla, and a pinch of salt. Stir until the flour is just incorporated; over‑mixing can lead to a dense crumb. The batter will thicken slightly as the flour absorbs the liquids. This is the point where the cake’s structure starts to form.
- Fold in macapuno. Gently fold the macapuno strings into the batter, ensuring they’re evenly distributed. The macapuno should be visible throughout, giving the cake a marbled look. This step adds a chewy texture that contrasts with the smooth base.
- Pour and level. Transfer the batter to the prepared pan, smoothing the top with a spatula. Tap the pan gently on the counter to release any air bubbles. This ensures an even rise and prevents the cake from cracking. The batter should fill the pan to about three‑quarters of its height.
- Bake until golden. Place the pan in the oven and bake for 30 minutes, or until the top turns a deep golden brown and a toothpick inserted in the center comes out clean. The cake will develop a caramelized crust that adds a subtle depth of flavor. Keep an eye on the color; if it browns too quickly, tent the pan with foil.
- Cool and serve. Remove the cake from the oven and let it cool in the pan for 10 minutes before transferring it to a wire rack. Slice with a hot knife to keep the edges clean. Serve at room temperature, or chill for a firmer bite. The cake can be topped with a drizzle of condensed milk or a dusting of powdered sugar if desired.
That's it — you did it. But hold on, I've got a few more tricks that'll take this to another level...
Insider Tricks for Flawless Results
The Temperature Rule Nobody Follows
Many bakers bake at 350°F, but this cake benefits from a slight temperature tweak. Starting the bake at 375°F for the first 10 minutes and then lowering to 350°F helps set the top without drying out the center. The quick initial heat creates a crust that locks in moisture. I’ve baked this cake at a steady 350°F and the top was a bit soggy; the temperature shift fixed it.
Why Your Nose Knows Best
As the cake bakes, the aroma will change from sweet to nutty to caramelized. Trust your nose; when it starts smelling like toasted coconut, the cake is almost done. The scent is a reliable indicator that the center is set without overcooking the edges. I’ve used this olfactory cue for years, and it never fails.
The 5-Minute Rest That Changes Everything
After removing the cake from the oven, let it rest in the pan for exactly 5 minutes. During this time, the steam continues to cook the interior, ensuring a moist crumb. Skipping this step often results in a dry top. I’ve tried baking a cake and cutting into it immediately; the center was raw. The rest fixes that.
Use a Light Dusting of Flour
Dusting the batter with a small amount of flour before baking helps the cake rise evenly and prevents a domed top. It also creates a slight crumb that’s easier to slice. A common mistake is to skip this, leading to a collapsed center. The flour acts as a gentle lift.
Cooling on a Wire Rack
Cooling the cake on a wire rack allows air to circulate around it, preventing steam from making the bottom soggy. If you let the cake sit in the pan, the steam condenses and creates a wet surface. This is especially important for a dense cake like this, where moisture retention is key.
Reheating Tip
When reheating leftovers, place the cake in a preheated oven at 300°F for 10 minutes. The low heat gently warms the cake without drying it out. If you’re in a hurry, microwave for 15-20 seconds, but be careful not to overheat. The key is to maintain the moisture.
Creative Twists and Variations
Chocolate Ube Cassava Cake
Swap half the ube halaya with melted dark chocolate for a rich, bittersweet twist. The chocolate adds depth and a slightly bitter finish that pairs well with the sweet coconut. This version is perfect for chocolate lovers and adds a dramatic color contrast.
Almond Butter Variant
Replace the regular butter with almond butter for a nutty undertone. The almond butter also adds protein and a subtle crunch. The cake will have a slightly firmer texture, making it a great option for those looking for a heartier dessert.
Spiced Ube Cake
Incorporate a pinch of ground cinnamon and nutmeg into the batter. The spices give the cake a warm, aromatic profile that’s reminiscent of holiday desserts. This variation is ideal for cooler weather or when you want a more complex flavor.
Low‑Sugar Version
Reduce the white sugar by one cup and add a splash of stevia or monk fruit sweetener. The cake will still be sweet but with a lower glycemic impact. This is a great option for those monitoring their sugar intake.
Gluten‑Free Edition
Swap the all‑purpose flour for an equal amount of rice flour or a gluten‑free blend. The texture will be slightly different, but the cake will still hold together nicely. This version keeps the flavor intact while accommodating dietary restrictions.
Vegan Adaptation
Use plant‑based milk (such as oat or soy) instead of coconut milk, and replace the eggs with flaxseed meal or a commercial egg replacer. The cake will still be moist and flavorful, though the crumb may be slightly denser. This makes the dessert accessible to vegans without compromising taste.
Storing and Bringing It Back to Life
Fridge Storage
Wrap the cooled cake tightly in plastic wrap and store it in an airtight container. It will keep fresh for up to 3 days in the refrigerator. The moisture from the wrapping prevents the cake from drying out and keeps the ube color vibrant.
Freezer Friendly
Freeze the cake in a freezer‑safe container, wrapped in parchment paper. It can stay frozen for up to 2 months. When ready to eat, let it thaw at room temperature for an hour, then warm it slightly in a low‑heat oven to restore its softness.
Best Reheating Method
To reheat, place the cake slice in a preheated oven at 300°F for 5-8 minutes. The gentle heat warms the cake without overcooking it. For a quick fix, microwave on low for 15-20 seconds, watching closely to avoid a rubbery texture.