When I was six, I accidentally set my blender on fire by trying to make a “superfood” smoothie that included dates, nuts, and a dash of cocoa. The kitchen smelled like scorched sugar and I was left with a charred countertop and a lesson in caution. That incident taught me that flavor can be achieved without a blaze, and that the secret to a great snack is balance, not heat. Now, after years of experimenting, I’ve distilled the perfect no‑cook energy ball that tastes like a dessert, fuels like a snack, and feels like a hug in a bite. This recipe is the culmination of countless trials, a testament to the power of simple ingredients.
The first time I tried this recipe, I was skeptical. The dates seemed too sweet, the almonds too dry, and the cocoa a bit bitter. Yet, as soon as the mixture hit my palms, the sticky sweetness of the dates mingled with the nutty crunch of almonds, and the cocoa’s richness settled into a velvety coating. The aroma that rose was a sweet, earthy perfume that made my mouth water even before the first bite. I realized that the right combination of textures and flavors could create something that feels indulgent yet wholesome.
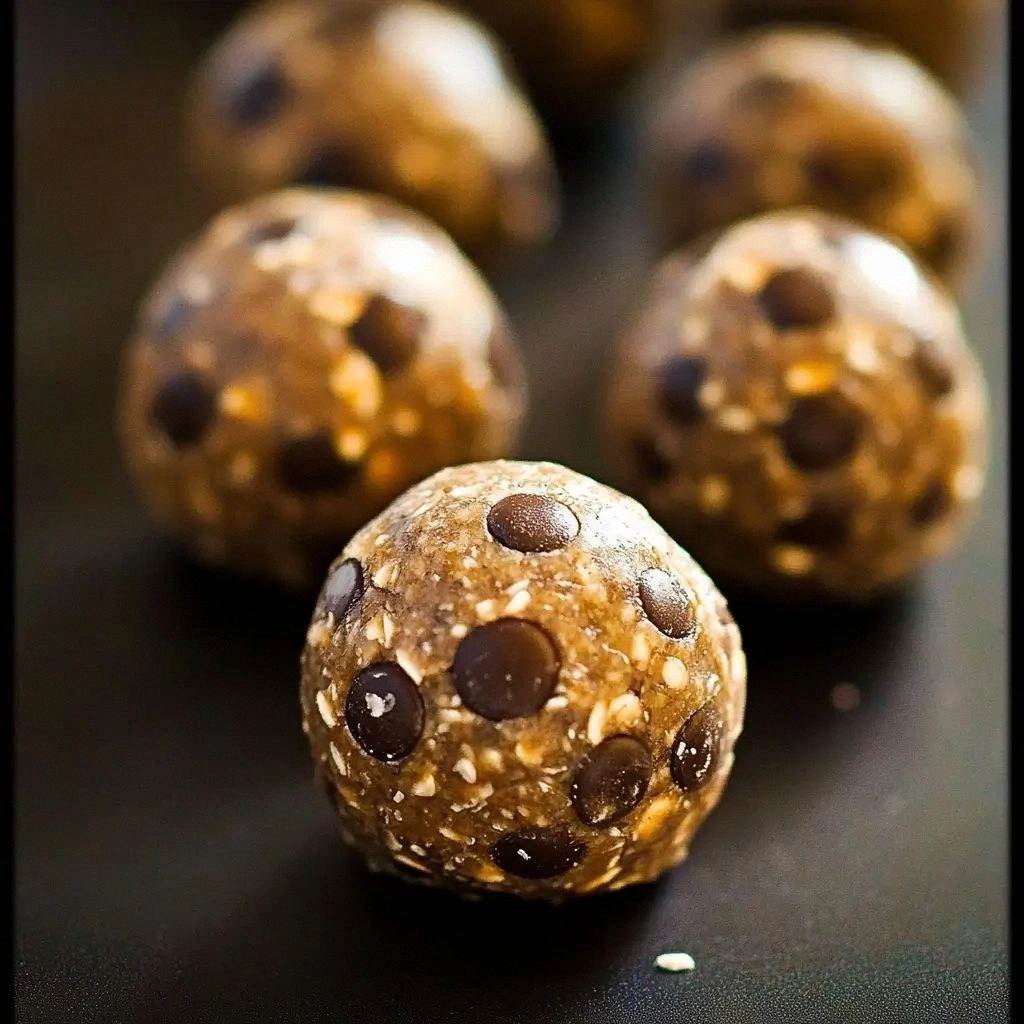
What makes this version stand out is that it’s not just a handful of ingredients, it’s a carefully orchestrated dance of flavors, textures, and nutritional benefits. Each component has a purpose: dates for natural sweetness and binding, almonds for protein and crunch, coconut for a tropical finish, and cocoa for that deep chocolate note. The blend of peanut butter and honey creates a silky base that holds everything together. The result is a bite that is chewy, slightly crunchy, and absolutely satisfying.
I dare you to taste this and not go back for seconds. The first bite feels like a burst of sweet energy, the second like a comforting hug, and the third like a promise of more. If you’ve ever been disappointed by a snack that tasted great but left you hungry, this will change your perception. It’s a snack that satisfies the sweet tooth, fuels the body, and feels like a treat.
When I first shared these balls with a friend at a potluck, the reaction was instant. Everyone wanted a second, then a third. The conversation shifted from “what’s that?” to “how do I make it?” and I realized I had stumbled upon something that could become a staple in anyone’s pantry. I was excited, but also a little nervous—what if it didn’t live up to the hype? I didn’t want to disappoint.
That night, I spent the whole evening refining the recipe. I tested different ratios, tried various nuts, and experimented with protein powders. I discovered that a small amount of vanilla extract could elevate the entire flavor profile, adding a subtle warmth that balanced the bitterness of cocoa. I also found that the right amount of coconut not only added flavor but also helped the balls hold together without becoming sticky.
Now, the recipe is a blend of science and intuition. The dates are the glue, the almonds the crunch, the cocoa the depth, and the coconut the finish. The peanut butter and honey create a silky base that keeps everything together. The protein powder adds a nutritional boost that makes this snack suitable for post‑workout recovery. The result is a bite that is chewy, slightly crunchy, and absolutely satisfying.
Picture yourself pulling this out of the fridge after a long day at work. The scent of toasted coconut and chocolate lingers in the air, and the sight of perfectly formed balls invites you to indulge. The texture is a delightful contrast between the chewy core and the slightly crunchy coating. The flavor is a harmonious blend of sweet, nutty, and chocolatey notes. It’s the kind of snack that makes you feel proud of what you’re eating.
Most recipes get this completely wrong by over‑processing the ingredients or using too much liquid. The result is a mushy mess that falls apart on a plate. I’ve learned that the key is to blend just enough to form a cohesive mixture, then let it chill so the flavors meld. The final product is a ball that holds its shape, delivers a burst of flavor, and stays fresh for days.
Let me walk you through every single step — by the end, you'll wonder how you ever made it any other way.
What Makes This Version Stand Out
- Flavor: The blend of sweet dates, nutty almonds, and deep cocoa creates a complex profile that satisfies both sweet and savory cravings. The vanilla extract adds a subtle warmth that ties everything together. The result is a snack that feels indulgent without compromising health.
- Texture: The mixture is chewy yet slightly crunchy, thanks to the almonds and coconut. The cocoa powder provides a smooth coating that doesn’t overwhelm the natural flavors. Each bite delivers a satisfying contrast.
- Nutrition: Packed with protein from almonds and protein powder, healthy fats from peanut butter, and fiber from dates, these balls are a balanced snack. They offer a quick energy boost without the crash associated with sugary treats.
- Ease: No cooking required, just a few minutes of blending and rolling. The recipe is beginner‑friendly and can be made in under 30 minutes. It’s ideal for busy mornings or post‑workout cravings.
- Versatility: You can swap ingredients for dietary preferences—use almond butter, maple syrup, or a plant‑based protein powder. The recipe adapts to vegan, keto, or paleo lifestyles with minor tweaks.
- Make‑Ahead: The balls keep well in the fridge for a week or frozen for up to three months. They’re perfect for meal prep, travel, or stocking a snack drawer.
Inside the Ingredient List
The Flavor Base
Dates are the heart of this recipe, providing natural sweetness, a sticky binder, and a subtle caramel note. They also contribute fiber, potassium, and antioxidants that give the balls a healthful edge. If you skip them, the mixture will lack cohesion and sweetness, resulting in a dry, unappealing snack.
Peanut butter acts as a creamy medium that holds the mixture together while adding protein and a rich nutty flavor. It also balances the sweetness of the dates, preventing the balls from becoming too sugary. A light or natural peanut butter works best; avoid creamy varieties with added sugars.
Honey offers a natural sweetener that’s more complex than refined sugar. It also contributes to the binding process, giving the balls a slightly sticky texture. If you’re avoiding honey, a small amount of maple syrup can serve as a suitable alternative.
The Texture Crew
Almonds bring a satisfying crunch and a boost of protein and healthy fats. They also provide a nutty aroma that complements the cocoa. If you prefer a different nut, walnuts or pecans can be used, but they may alter the flavor profile slightly.
Shredded coconut adds a tropical twist and a chewy texture that coats the balls. It also helps to keep the mixture from sticking to your hands during rolling. If you’re gluten‑free, choose unsweetened coconut to avoid added sugars.
Protein powder, whether whey or plant‑based, increases the protein content and gives the balls a firmer structure. It also allows the snack to be more filling, making it ideal for post‑workout recovery. If you’re vegan, a pea or brown rice protein powder works well.
The Unexpected Star
Cocoa powder is the secret weapon that transforms this snack into a chocolate lover’s dream. It provides a deep, bittersweet flavor that balances the sweetness of dates and honey. The cocoa also adds antioxidants, making the snack even healthier.
Vanilla extract is the subtle hero that brings warmth and depth to the flavor profile. A teaspoon is enough to elevate the entire mixture without overpowering the other ingredients. If you’re allergic, a few drops of almond extract can be a suitable substitute.
Sea salt is essential to enhance the overall flavor and to balance the sweetness. A pinch is enough; too much can ruin the taste. If you prefer a different salt, a sprinkle of flaky sea salt can add a nice texture.
The Final Flourish
Dark chocolate chips add a crunchy, melty element that enhances the chocolate flavor and adds visual appeal. They also provide a richer, bittersweet finish that many chocolate lovers crave. If you’re avoiding dairy, choose dairy‑free chocolate chips.
Almond flour is optional but can be added for extra binding power and a subtle nutty flavor. It’s especially useful if you find the mixture too sticky or if you want a more cake‑like texture. Use a tablespoon or two depending on your preference.
Chili flakes are a daring twist that can add a subtle heat to the balls, making them more exciting. A pinch is enough to give a gentle kick without overpowering the chocolate. This is a great option for those who enjoy spicy desserts.
Everything's prepped? Good. Let's get into the real action...
The Method — Step by Step
- Step 1: Prep the Dates Place the pitted dates in a bowl and pour warm water over them. Let them soak for 10 minutes to soften. Drain the water and pat the dates dry with a paper towel. This step ensures the dates are easy to blend and don’t release excess liquid. It also helps the mixture bind more effectively.
- Step 2: Blend the Dates Add the soaked dates to a high‑speed blender or food processor. Pulse until the dates break down into a sticky paste. The paste should be smooth but still have a slightly granular texture. This consistency is crucial for the balls to hold together. If the mixture is too thick, add a splash of almond milk.
- Step 3: Add Nuts and Coconut Insert the almonds and shredded coconut into the blender. Pulse a few times to combine. The nuts should be finely chopped but not ground into a powder. This keeps the texture interesting. The coconut adds a chewy coating that prevents sticking.
- Step 4: Incorporate Peanut Butter and Honey Pour in the peanut butter and honey. Blend until the mixture is fully incorporated and smooth. The peanut butter adds creaminess, while the honey brings a natural sweetness. If the mixture feels too dry, add a tablespoon of water or almond milk. If it’s too wet, add more coconut or almond flour.
- Step 5: Add Cocoa, Vanilla, and Protein Powder Sprinkle in the cocoa powder, vanilla extract, and protein powder. Blend again until the mixture is uniform. The cocoa should coat the mixture evenly, giving a deep chocolate flavor. The protein powder adds structure and boosts nutrition. If the mixture becomes too thick, add a teaspoon of almond milk.
- Step 6: Season with Salt Add a pinch of sea salt. The salt enhances all the flavors and balances the sweetness. Stir gently to distribute the salt evenly. Be careful not to over‑salt, as the salt will be subtle but noticeable.
- Step 7: Chill the Mixture Transfer the mixture to a bowl, cover with plastic wrap, and refrigerate for 30 minutes. Chilling firms the mixture, making it easier to roll into balls. The flavors also meld together during this time, creating a more cohesive taste.
- Step 8: Roll the Balls Scoop a heaping tablespoon of the chilled mixture with a small cookie scoop or spoon. Roll it between your palms to form a ball. The balls should be about 1.5 inches in diameter. If they feel too loose, let them chill for an additional 10 minutes. If they’re too hard, give them a few minutes at room temperature.
- Step 9: Coat in Coconut or Cocoa Place shredded coconut or cocoa powder in a shallow dish. Roll each ball in the coating until fully covered. This not only adds flavor but also prevents the balls from sticking together. Store them in an airtight container.
- Step 10: Chill Until Firm Place the coated balls on a parchment‑lined tray and refrigerate until firm, about 30 minutes. The final product should be firm yet chewy. Store in the fridge for up to a week or freeze for up to three months.
- Step 11: Optional Chocolate Drizzle If you want an extra chocolatey finish, melt a few dark chocolate chips in a double boiler or microwave. Drizzle the melted chocolate over the chilled balls. Let the chocolate set at room temperature or in the fridge. This adds a glossy finish and a richer flavor.
That’s it — you did it. But hold on, I've got a few more tricks that'll take this to another level. These insider tips will help you perfect the texture, flavor, and presentation of your energy balls.
Insider Tricks for Flawless Results
The Temperature Rule Nobody Follows
Temperature affects texture significantly. If the mixture is too cold, it will be hard to roll; if too warm, it will be sticky. Aim for a room temperature mixture that’s just pliable. This balance ensures the balls hold their shape without cracking.
Why Your Nose Knows Best
The aroma of the mixture is a reliable indicator of readiness. A sweet, nutty scent means the dates and nuts have blended well. If you smell a sharp almond or cocoa, the mixture might need more blending.
The 5‑Minute Rest That Changes Everything
After chilling, let the mixture rest for 5 minutes before rolling. This brief rest allows the flavors to meld further and the mixture to firm slightly, making it easier to shape.
Don’t Skip the Salt
Even a small pinch of sea salt elevates the chocolate flavor. Salt balances sweetness and brings out the nutty undertones. Skipping it will result in a flat taste.
Use a Silicone Mat
Rolling the balls on a silicone mat prevents sticking and keeps the surface clean. It also provides a non‑stick surface that’s easy to clean afterward.
Keep a Small Bowl of Water Handy
If the mixture starts to dry out, dip your hands in water to keep them from sticking. This simple trick saves you from frustration.
Creative Twists and Variations
This recipe is a playground. Here are some of my favorite ways to switch things up:
Almond Joy Edition
Swap the peanut butter for almond butter and add shredded coconut to the mixture. Use dark chocolate chips for a richer flavor. This version mimics the classic candy bar with a healthy twist.
Spiced Chai Balls
Incorporate a teaspoon of chai spice blend into the mixture. Replace the vanilla extract with a splash of almond milk for a milder flavor. The warm spices pair beautifully with the chocolate.
Berry Blast
Add a handful of freeze‑dried berries to the mixture for a fruity kick. Use a light cocoa powder to keep the color bright. This version offers a burst of natural sweetness.
Nutty Protein Power
Use a plant‑based protein powder and swap almonds for pistachios. Add a tablespoon of flaxseed for extra omega‑3s. The result is a protein‑dense, nutty snack.
Chocolate Peanut Butter Swirl
After rolling the balls, roll them in a thin layer of melted peanut butter before coating with coconut. This creates a swirl effect and a richer peanut flavor. It’s a fun visual and taste upgrade.
Storing and Bringing It Back to Life
Fridge Storage
Place the energy balls in an airtight container in the refrigerator. They stay fresh for up to a week. The cold environment keeps them firm and prevents mold growth.
Freezer Friendly
Store the balls in a freezer‑safe zip‑lock bag or airtight container. Freeze for up to three months. When ready to eat, let them thaw at room temperature for 15 minutes.
Best Reheating Method
To revive the texture, place the frozen balls in the microwave on a low setting for 10–15 seconds. Alternatively, warm them in a 350°F oven for 5 minutes. A splash of water before reheating steams them back to perfection.