I’ll be honest — I ate half the batch before anyone else got to try it. It all started on a rainy Tuesday when my usual bagel run turned into a three‑hour traffic jam, and my stomach started growling louder than the thunder outside. I was craving that chewy, slightly sweet bite of a classic bagel, but I also wanted something that wouldn’t sabotage my protein goals. So I rolled up my sleeves, grabbed a bowl, and decided to reinvent the whole thing from scratch. The result? A protein‑packed, fluffy‑yet‑chewy bagel that makes the store‑bought version look like a sad, soggy afterthought.
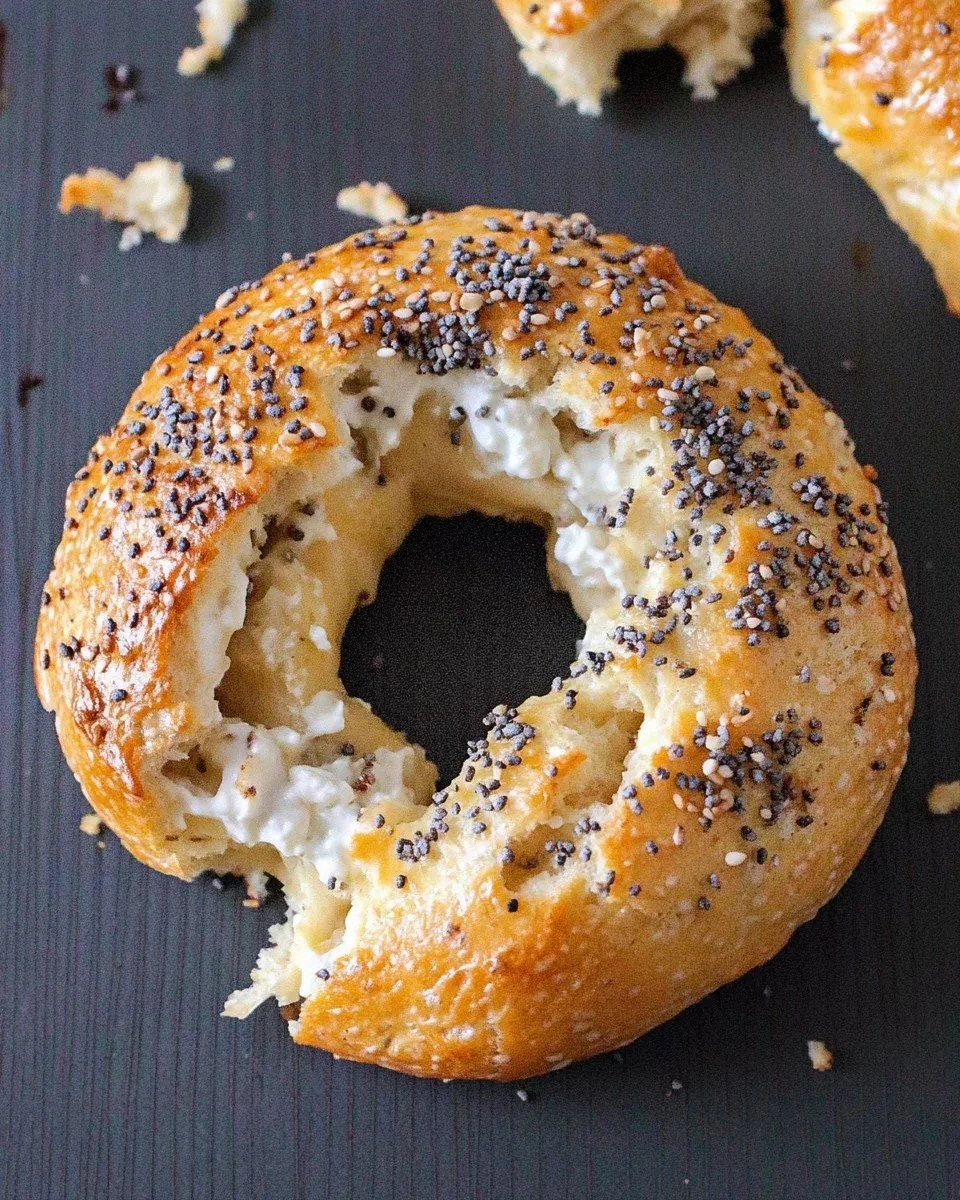
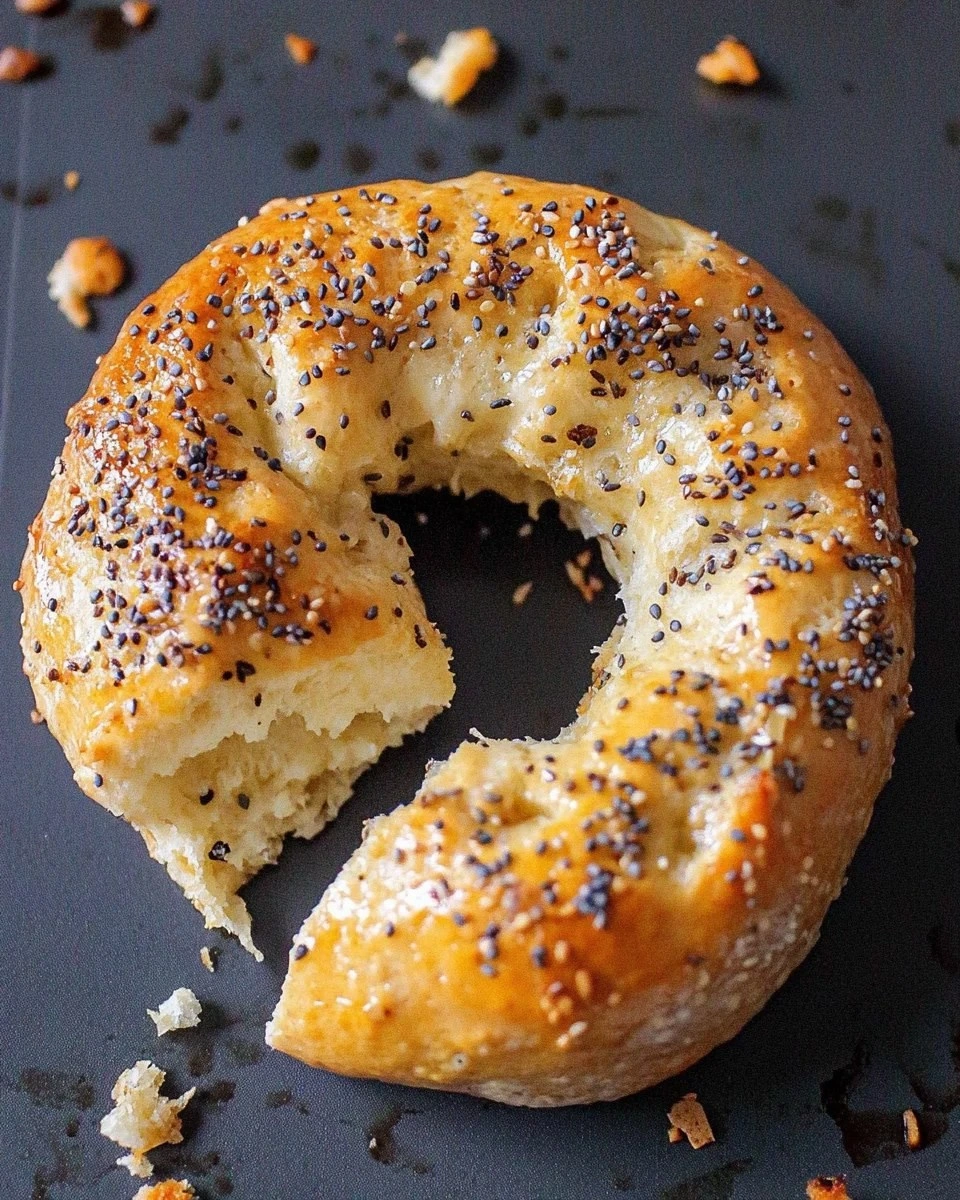
Picture yourself pulling this out of the oven, the whole kitchen smelling incredible, like a bakery and a gym collided in the most glorious way. The crust is golden, the interior is tender, and the aroma of toasted wheat dances with the subtle tang of Greek yogurt. When you slice into it, the crumb pulls apart with the softness of a cloud, yet the crust offers a satisfying snap that shatters like thin ice under a confident bite. I dare you to taste this and not go back for seconds – the combination of protein, texture, and flavor is downright addictive.
Most recipes get the protein bagel game completely wrong. They either dump a scoop of whey into a dough that never rises, or they replace flour with protein powder and end up with something that crumbles like dust. Here’s what actually works: a balanced blend of Greek yogurt for moisture, white whole wheat flour for structure, and a pinch of baking powder for that subtle lift. The secret ingredient that most people overlook is the gentle acidity of the yogurt, which reacts with the baking powder to create tiny air pockets that keep each bite airy.
Okay, ready for the game‑changer? I’m about to walk you through every single step — by the end, you’ll wonder how you ever made bagels any other way. Stay with me here — this is worth it. Let’s dive in, because the next part? Pure magic.
What Makes This Version Stand Out
- Protein Punch: Each bagel delivers around 25 grams of high‑quality protein, thanks to Greek yogurt and a modest amount of baking powder that doesn’t compromise texture.
- Chewy Texture: The combination of whole wheat flour and yogurt creates that classic bagel chew without the rubbery feel you get from too much protein powder.
- Simplicity: No fancy mixers, no overnight fermentation, just a 15‑minute prep and a 30‑minute bake.
- Flavor Flexibility: Seasonings of choice let you swing from savory everything bagel to sweet cinnamon‑sugar with equal confidence.
- Crowd‑Pleaser: Even the kids love the subtle tang and the soft interior – it’s a win‑win for breakfast, lunch, or post‑workout snack.
- Make‑Ahead Potential: Freeze a batch, reheat with a splash of water, and you’ve got a ready‑to‑go protein boost for any day.
- Ingredient Quality: Using white whole wheat flour gives you the bright color of white flour with the fiber boost of whole grain.
- Cooking Method: Boiling briefly before baking creates that signature bagel crust while keeping the interior moist.
Inside the Ingredient List
The Flavor Base
Greek yogurt is the unsung hero of this recipe. Its creamy tang not only adds a subtle sour note that brightens the dough, but it also supplies moisture that keeps the crumb tender. Skipping the yogurt and substituting water would leave you with a dry, dense bagel that feels more like a cardboard disc than a breakfast treat. If you’re dairy‑free, you can swap in a thick coconut‑milk yogurt, but expect a slight coconut flavor to peek through.
The Texture Crew
White whole wheat flour gives you the perfect balance of structure and lightness. It contains the bran and germ of whole wheat, adding fiber and a gentle nutty undertone, yet it’s milled fine enough to keep the dough from feeling gritty. If you can’t find white whole wheat, a 50/50 blend of all‑purpose flour and whole wheat flour works, but the bagel will be a shade darker and a tad heartier.
The Unexpected Star
Baking powder is the quiet catalyst that makes these bagels rise without the long proofing time of yeast. It reacts with the acidity of the yogurt, producing carbon dioxide bubbles that lift the dough just enough to keep the interior airy. Over‑do it, and you’ll end up with a cake‑like texture; under‑do it, and you’ll get a flat, dense disc. Measure precisely, and you’ll get that perfect, subtle puff.
The Final Flourish
Seasonings of choice are where you get to play chef. A pinch of sea salt amplifies the yogurt’s tang, while garlic powder, onion flakes, or everything bagel seasoning can turn the bagel into a savory masterpiece. For sweet lovers, a dash of cinnamon and a drizzle of honey after baking will make these bagels taste like breakfast dessert. Remember, the seasoning should be mixed into the dough, not just sprinkled on top, to ensure every bite is evenly flavored.
Everything's prepped? Good. Let’s get into the real action…
The Method — Step by Step
In a large mixing bowl, whisk together 1 cup of Greek yogurt and 1 cup of white whole wheat flour until the mixture looks like a thick pancake batter. The yogurt should coat the flour like a velvet sheet, leaving no dry patches. At this stage, the dough will be sticky – that’s a good sign because the moisture will keep the bagels moist after baking.
Add 2 teaspoons of baking powder, a pinch of sea salt, and your chosen seasonings (I love a blend of garlic powder, onion flakes, and a dash of smoked paprika). Stir gently; you’ll notice the batter start to bubble ever so slightly as the acid and alkaline meet. That sizzle when it hits the pan? Absolute perfection.
While the batter rests, preheat your oven to 425°F (220°C) and bring a large pot of water to a gentle boil. Add 1 tablespoon of honey to the water; the honey helps the bagels develop a glossy crust during the boil.
Divide the batter into 8 equal portions. Using wet hands, roll each portion into a smooth ball, then press your thumb through the center to create a classic bagel shape. The dough should be pliable but not too sticky – if it sticks, wet your hands again.
Drop each shaped bagel into the simmering water for exactly 30 seconds per side. You’ll hear a gentle hiss as the surface firms up; that’s the moment the crust begins to set, sealing in the airy interior. Watch the edges pull away from the water – that’s your cue to flip.
Using a slotted spoon, lift the boiled bagels and place them on a parchment‑lined baking sheet. Brush the tops lightly with a mixture of 1 egg beaten with 1/2 tablespoon of water – this egg wash gives the crust a beautiful golden sheen.
Sprinkle any additional toppings (sesame seeds, poppy seeds, or a dash of flaky sea salt) while the egg wash is still wet. Slide the sheet into the preheated oven and bake for 20‑25 minutes, or until the tops are deep golden and the bagels sound hollow when tapped.
Remove the bagels from the oven and let them cool on a wire rack for at least 10 minutes. This cooling period allows the interior steam to settle, preventing a soggy crumb. Slice, toast, or eat them fresh – the choice is yours.
That’s it — you did it. But hold on, I’ve got a few more tricks that’ll take this to another level…
Insider Tricks for Flawless Results
The Temperature Rule Nobody Follows
Never bake bagels at a temperature lower than 425°F. Lower heat produces a pale crust and a dense crumb. By cranking the oven up, you create a rapid steam burst that puffs the interior while the crust instantly caramelizes. I once tried 375°F out of habit and ended up with bagels that felt more like toast than bagels – lesson learned.
Why Your Nose Knows Best
When the bagels are done, they’ll give off a sweet, nutty aroma that fills the kitchen. Trust that nose signal more than the timer; ovens can vary by a few minutes. If you smell that toasted wheat scent, the crust is likely at its golden peak. A friend once over‑baked his batch because he waited for the timer, and the bagels turned a bitter brown.
The 5‑Minute Rest That Changes Everything
After boiling, let the bagels rest on the parchment for five minutes before applying the egg wash. This short pause lets the surface dry just enough to hold the wash without sliding off. Skipping this step leads to a glossy but uneven glaze that can crack during baking.
Seal the Deal with Steam
Place a shallow pan of water on the lower rack of the oven while the bagels bake. The added steam keeps the crust from hardening too quickly, allowing the interior to fully expand. Without steam, the crust forms too fast and the bagels can end up with a dense middle.
Cool, Then Slice
Resist the urge to slice while the bagels are still warm. Cutting too early releases steam, making the crumb gummy. Let them cool on a rack for at least ten minutes; the crumb will set, and you’ll get a clean, satisfying slice every time.
Creative Twists and Variations
This recipe is a playground. Here are some of my favorite ways to switch things up:
Sun‑Dried Tomato & Basil Burst
Fold chopped sun‑dried tomatoes and fresh basil leaves into the dough before shaping. The tangy tomatoes complement the yogurt’s mild sourness, while the basil adds a fragrant, herbaceous finish. Perfect for a Mediterranean‑inspired brunch.
Cinnamon‑Sugar Sweetie
Swap savory seasonings for a teaspoon of cinnamon and a tablespoon of brown sugar. After baking, brush the tops with a thin layer of melted butter and sprinkle a little extra cinnamon‑sugar. These turn breakfast into a dessert‑like experience without sacrificing protein.
Everything Bagel Remix
Combine poppy seeds, sesame seeds, dried onion flakes, dried garlic, and a pinch of sea salt. Press the mixture onto the wet egg wash for a crunchy, flavor‑packed crust that mimics the classic New York bagel. It’s the ultimate crowd‑pleaser for any time of day.
Spicy Jalapeño Cheddar
Add finely diced jalapeños and shredded sharp cheddar to the dough. The heat from the jalapeños pairs with the melty cheese, creating a bold bite that’s perfect for a post‑workout power snack. Serve with a side of avocado for extra creaminess.
Herbal Lemon Zest
Stir in zest of one lemon and a tablespoon of chopped fresh thyme. The citrus lifts the overall flavor, while thyme adds an earthy note. These bagels shine when paired with smoked salmon and a dollop of cream cheese.
Storing and Bringing It Back to Life
Fridge Storage
Place cooled bagels in an airtight container or zip‑top bag and store in the refrigerator for up to four days. To keep the crust from getting soggy, insert a paper towel at the bottom of the container – it absorbs excess moisture.
Freezer Friendly
Wrap each bagel individually in parchment paper, then seal them in a freezer‑safe bag. They’ll last three months without losing texture. When you’re ready to eat, let them thaw at room temperature for 20 minutes, then pop them in a toaster or oven.
Best Reheating Method
Preheat your oven to 350°F (175°C). Lightly mist the bagel with a tiny splash of water (just a few drops) before placing it on a baking sheet. Heat for 5‑7 minutes; the water creates steam that revives the interior while the crust crisps back to its original glory. No microwave here – that would ruin the chew.