I was staring at a cracked chocolate bar on my counter, feeling the urge to rescue it from the brink of disappointment. The kitchen had a faint scent of burnt sugar and an echo of my last attempt at brownies that had turned into a chewy, soggy mess. That night, I dared myself to turn that failure into a triumph by adding a silky ganache that would transform the whole experience. The moment the chocolate melted, the air filled with a rich, dark aroma that promised decadence. I knew I had stumbled upon something that would change every future batch. And that’s how a kitchen mishap turned into a sweet revelation.
Picture the kitchen as a stage where butter meets sugar in a swirling dance of caramelized sweetness. The sound of the whisk slicing through the batter is like a drumbeat, urging you to keep going. When the chocolate starts to steam, the kitchen smells like a chocolate factory, and your taste buds anticipate a burst of velvety richness. The texture feels thick and glossy, almost like a glossy paint that coats your tongue. You can almost hear the brownies sigh as they bake, a subtle crackle that signals they’re almost ready.
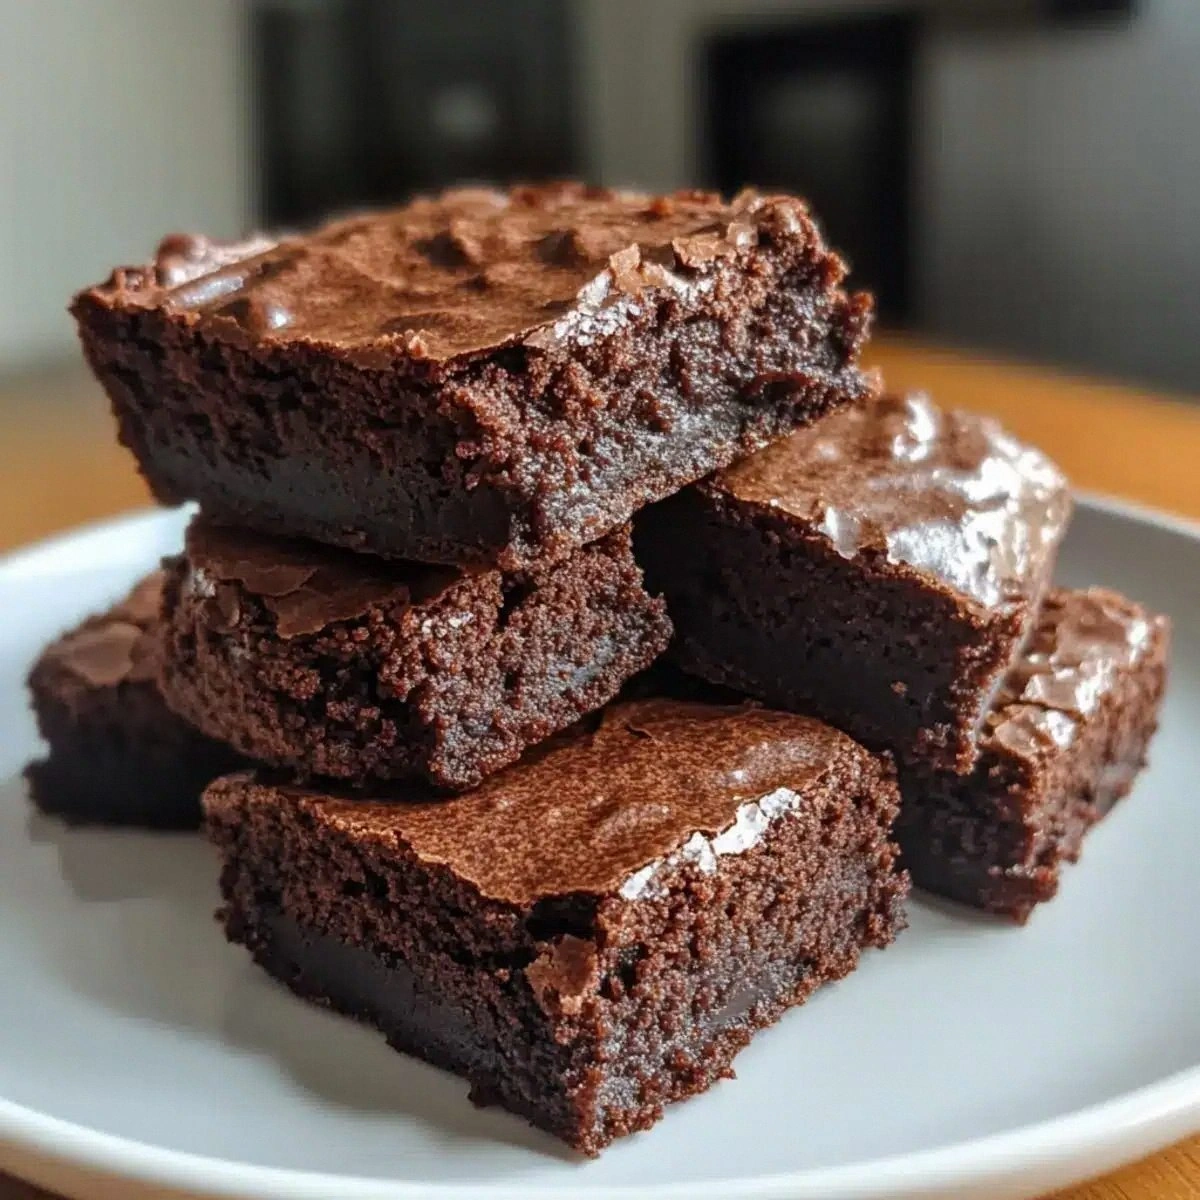
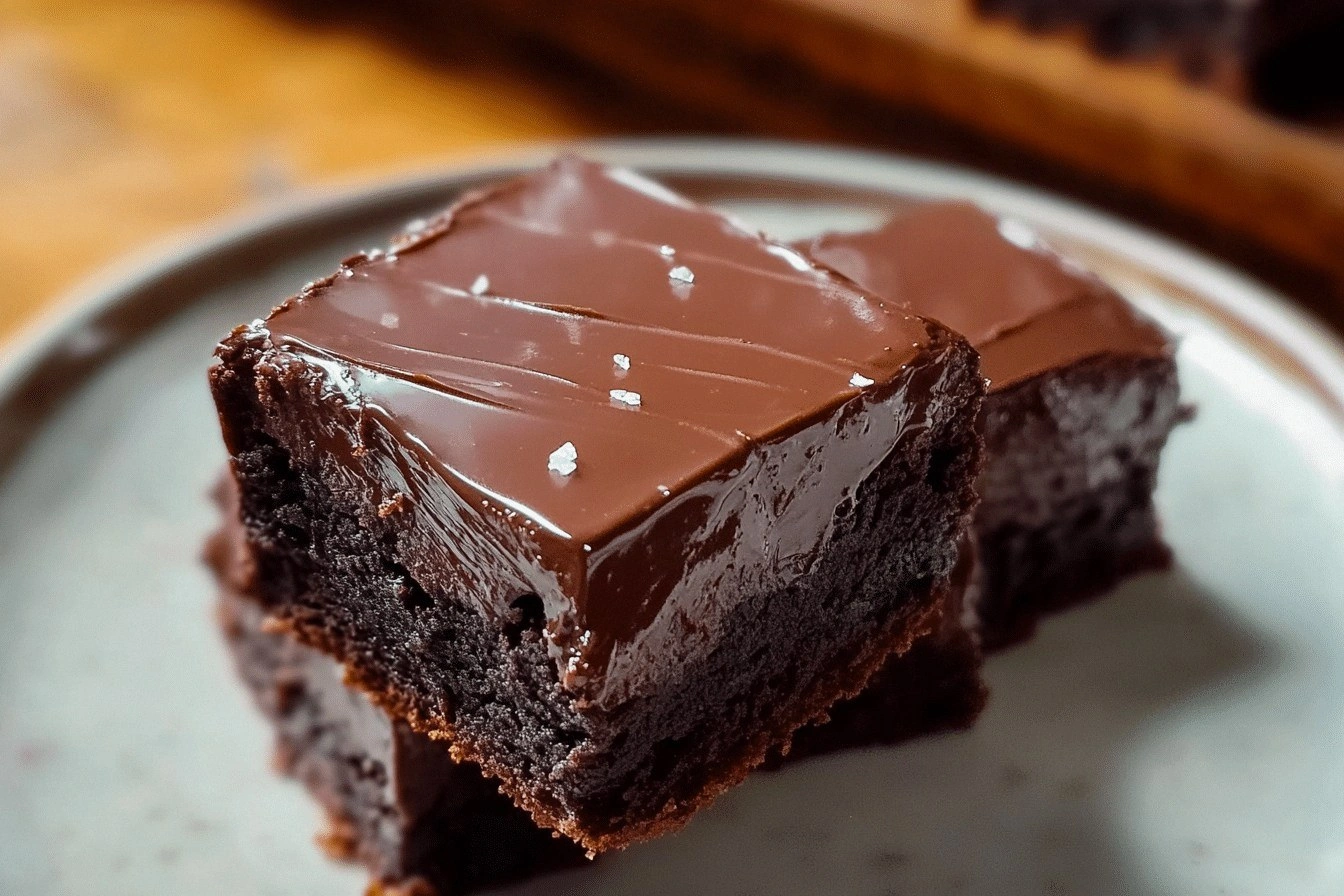
This version is hands down the best I’ve ever made because it balances fudgy density with a glossy, melt‑in‑your‑mouth ganache that coats each bite. The secret is in the double‑layer approach: a dense, chocolate‑laden base that is then crowned with a glossy ganache that adds a buttery, silky finish. It’s not just about taste; the visual contrast of the dark, glossy top against the matte brownie base is a feast for the eyes. The recipe also cuts the prep time in half by using a simple, no‑fuss method that anyone can follow. You’ll wonder how you ever made brownies any other way.
Most recipes get this completely wrong by either under‑baking the base or over‑cooking the ganache, resulting in a dry or runny finish. I dare you to taste this and not go back for seconds, because the first bite will leave you craving the second. Picture yourself pulling this out of the oven, the whole kitchen smelling incredible, and friends gathering around just to taste a piece. The next part? It’s pure magic, and I’ll walk you through every single step. By the end, you’ll have a batch that will have your friends asking for the recipe.
What Makes This Version Stand Out
- Flavor: The first bite delivers a deep chocolate flavor that lingers like a well‑played jazz solo. The combination of cocoa powder and melted chocolate creates a rich, layered taste profile. It’s the kind of flavor that stays on your palate long after you finish.
- Texture: The base is fudgy and moist, while the ganache adds a silky, glossy finish that melts on the tongue. The contrast between the dense brownie and the liquid ganache feels like a dessert symphony. The result is a mouth‑watering harmony that satisfies every craving.
- Simplicity: No special equipment needed—just a whisk, a saucepan, and a baking pan. The method is straightforward, yet the outcome feels luxurious. You’ll find yourself skipping the extra steps and still getting a masterpiece.
- Uniqueness: The double‑layer technique sets it apart, giving you a brownie that feels like a chocolate cake in one bite. The glossy ganache on top transforms the texture and appearance, making each piece a visual and edible delight. This isn’t your average brownie; it’s a statement dessert.
- Crowd Reaction: Friends who try it swear it’s the best version they’ve ever had, and they’ll keep asking for seconds. The instant feedback from the first bite is proof that this recipe works. It’s the kind of dish that becomes a staple at gatherings.
- Ingredient Quality: Using high‑quality chocolate and fresh butter elevates the flavor profile beyond ordinary brownies. The choice of ingredients makes the difference between good and unforgettable. You’ll taste the difference in every bite.
- Cooking Method: The precise oven temperature and baking time ensure the perfect rise without overcooking. The method is calibrated to produce a tender crumb with a slightly crisp edge. This balance is the key to the final texture.
- Make‑Ahead Potential: The ganache can be prepared a day ahead, letting you assemble the brownies just before serving. This flexibility makes it easy to serve on short notice. It’s a practical solution for last‑minute entertaining.
Inside the Ingredient List
The Flavor Base
Unsalted Butter is the cornerstone of a rich, buttery mouthfeel. When melted and mixed with sugars, it creates a glossy batter that holds the chocolate together. Skipping butter will leave the brownies dry and lacking depth.
Granulated Sugar provides the essential sweetness that balances the bitterness of cocoa. It also helps to create a tender crumb by preventing gluten formation. If you replace it with honey, the brownies will be denser and less crisp.
Brown Sugar adds a subtle molasses note that deepens the chocolate profile. Its natural moisture content keeps the brownies moist and chewy. Without it, the texture becomes crumbly.
Vanilla Extract lifts the overall flavor, giving the brownies a warm, aromatic backdrop. Even a small amount can make a noticeable difference. If you’re allergic, a splash of almond extract can be a suitable substitute.
The Texture Crew
Eggs act as the binder, providing structure and a slight lift. They also add richness and a silky mouthfeel. If you omit eggs, the brownies will crumble and lack cohesion.
All-Purpose Flour is the backbone of the batter, giving it body without making it cakey. Using cake flour will produce a lighter texture, but the brownies may lose their fudgy character. For a gluten‑free option, try a 1:1 blend of almond and oat flour.
Cocoa Powder is the heart of the chocolate flavor. Dark, unsweetened varieties yield a deeper taste, while Dutch‑process cocoa offers a milder profile. If you prefer a sweeter chocolate, consider adding a pinch of sea salt.
Salt balances the sweetness and enhances every flavor component. It’s essential for bringing out the richness of the chocolate. Too little salt, and the brownies will taste flat.
The Unexpected Star
Bittersweet or Semi‑Sweet Chocolate is the secret weapon that gives the brownies a luxurious, melt‑in‑your‑mouth quality. It’s the difference between ordinary and decadent. Use a high‑cocoa chocolate for an intense experience.
The Final Flourish
Heavy Cream is the base of the ganache, giving it a silky, glossy sheen. It also provides a rich, buttery flavor that complements the chocolate. If you’re looking for a lighter version, try half-and-half.
Chocolate Chips or Chopped Chocolate are melted into the ganache to add depth and a glossy finish. They also create a slight crunch when they set. You can swap them for chocolate chunks for a more rustic look.
Everything's prepped? Good. Let's get into the real action.
The Method — Step by Step
- Preheat the oven to 350°F (175°C) and line an 8‑inch square baking pan with parchment paper. The parchment ensures easy removal and a clean edge. A well‑lined pan prevents the brownies from sticking, which is crucial for a perfect presentation.
- Melt the butter in a medium saucepan over low heat until fully liquefied. Add the granulated and brown sugars, stirring until the mixture is glossy. The sugars should dissolve completely, creating a smooth base for the chocolate.
- Whisk in the eggs one at a time, ensuring each is fully incorporated before adding the next. Stir in the vanilla extract, letting the aroma fill the kitchen. This step is critical for achieving a tender crumb without overmixing.
- Sift together the flour, cocoa powder, and salt to remove any lumps. Fold the dry mixture into the wet batter until just combined; over‑stirring can lead to a tough texture. The batter should be thick yet pourable.
- Pour the batter into the prepared pan, smoothing the top with a spatula. Bake for 25–30 minutes, or until a toothpick inserted into the center comes out with a few moist crumbs. Watch the edges; they should pull away slightly, indicating doneness.
- Simultaneously, heat the heavy cream in a saucepan until it just begins to simmer. Remove from heat and pour it over the melted chocolate, stirring until the mixture is smooth and glossy. The ganache should coat the batter like a velvet blanket.
- Let the brownies cool for 10 minutes before pouring the ganache over the warm surface. Allow the ganache to set at room temperature for 30 minutes, then refrigerate for at least 2 hours before serving. This step ensures a firm yet creamy topping.
That's it — you did it. But hold on, I've got a few more tricks that'll take this to another level. These adjustments will make your brownies even more memorable.
Insider Tricks for Flawless Results
The Temperature Rule Nobody Follows
Many bakers think 350°F is a safe default, but a slight bump to 355°F can give the brownies a firmer crumb and a more pronounced chocolate flavor. Keep the oven rack in the middle to avoid overbrowning the edges. This small tweak can elevate the entire dessert.
Why Your Nose Knows Best
As the batter bakes, the aroma will start to intensify. If it smells like toasted chocolate, you’re on the right track. A faint nutty scent indicates the batter has reached optimal moisture, signaling it's time to pull the pan out.
The 5‑Minute Rest That Changes Everything
After removing the brownies from the oven, let them rest on a wire rack for exactly five minutes. This short pause allows the internal temperature to even out, preventing a soggy center. It also makes slicing easier.
Using a Microwave for Ganache
If you’re short on time, melt the chocolate chips in a microwave-safe bowl in 20‑second bursts, stirring between each burst. This method is fast and gives a smooth ganache without a double boiler.
Cooling Rack Trick
Place the pan on a cooling rack right after baking. The air circulation prevents a soggy bottom and keeps the brownies crisp on the edges. This simple trick gives a professional finish.
Creative Twists and Variations
Salted Caramel Swirl
Fold a swirl of salted caramel sauce into the batter before baking. The caramel adds a sweet‑salty contrast that pairs beautifully with the ganache. Serve with a drizzle of sea salt for an extra crunch.
Espresso‑Infused Brownies
Add a tablespoon of instant espresso powder to the batter. This gives a bold coffee undertone that complements the chocolate. It’s perfect for coffee lovers who crave a richer dessert.
Peanut Butter Swirl
Swirl a spoonful of creamy peanut butter into the batter before pouring it into the pan. The peanut butter adds a nutty flavor and a delightful texture contrast. Pair it with a chocolate ganache for a classic combination.
Mint Chocolate Ganache
Infuse the ganache with a few drops of peppermint extract. The mint gives a refreshing lift to the rich chocolate base. This variation is ideal for holiday celebrations.
Nutty Crunch Layer
Sprinkle chopped walnuts or pecans onto the batter before baking. The nuts add a crunchy texture and a subtle earthy flavor. They also provide a delightful visual contrast against the glossy ganache.
Storing and Bringing It Back to Life
Fridge Storage
Wrap the brownies tightly in plastic wrap and store them in the refrigerator for up to five days. The ganache will firm up, so slice them just before serving. Keep the brownies on a paper towel to absorb excess moisture.
Freezer Friendly
Place the brownies in an airtight container and freeze for up to two months. When ready to eat, let them thaw at room temperature for 30 minutes. The ganache remains smooth, and the brownies regain their fudgy texture.
Best Reheating Method
Reheat frozen brownies in a preheated 300°F oven for 10 minutes, then finish in the microwave for 15 seconds. Add a splash of water before reheating to create steam, which keeps the ganache from drying out. This trick restores the original mouthfeel.