I still remember the night I tried to make a “quick pizza” for a last‑minute dinner party and ended up with a kitchen that smelled like melted plastic and burnt cheese. The sweet rolls had turned into a soggy, rubbery mess, the pepperoni was a greasy, unappetizing slab, and the sauce had thickened into a syrupy glaze that clung to the pan like a bad habit. That disaster taught me that the secret to a perfect pizza slider isn’t in the ingredients alone but in the rhythm of the process and the small, intentional tweaks that make all the difference. I’m telling you now, this recipe is the antidote to that nightmare – a simple, foolproof sequence that turns humble sweet rolls into bite‑size, savory delights that melt in your mouth.
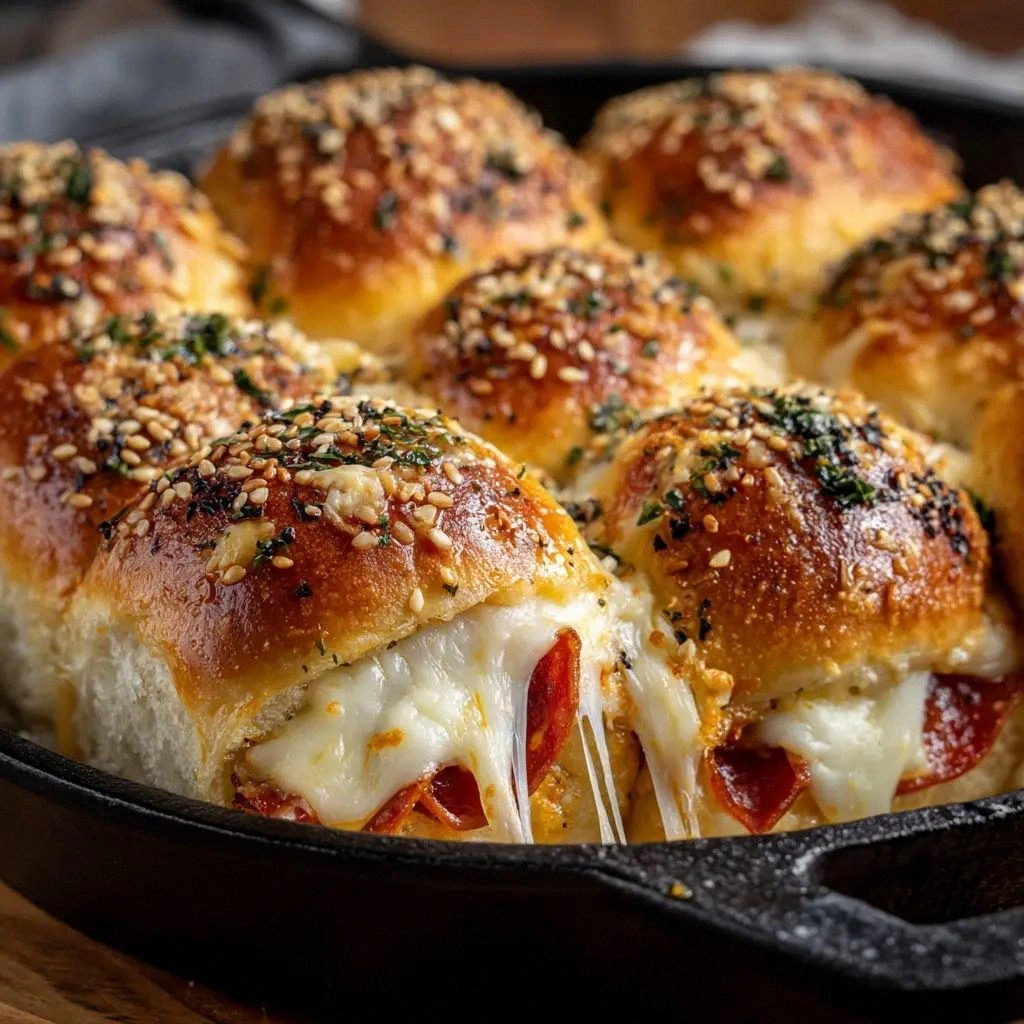
Picture this: you’re standing in a sunlit kitchen, the air filled with the aroma of butter sizzling and tomato sauce bubbling. The sweet rolls sit on the counter, their golden crusts promising a crisp bite. The pepperoni slices hiss as they hit the pan, releasing a savory perfume that makes your mouth water. As you flip the rolls, a golden sheen forms, and a faint crackle echoes like applause from a well‑tuned orchestra. The final result is a stack of mini pizzas that look like miniature fireworks, each slide of cheese stretching like a ribbon of molten gold.
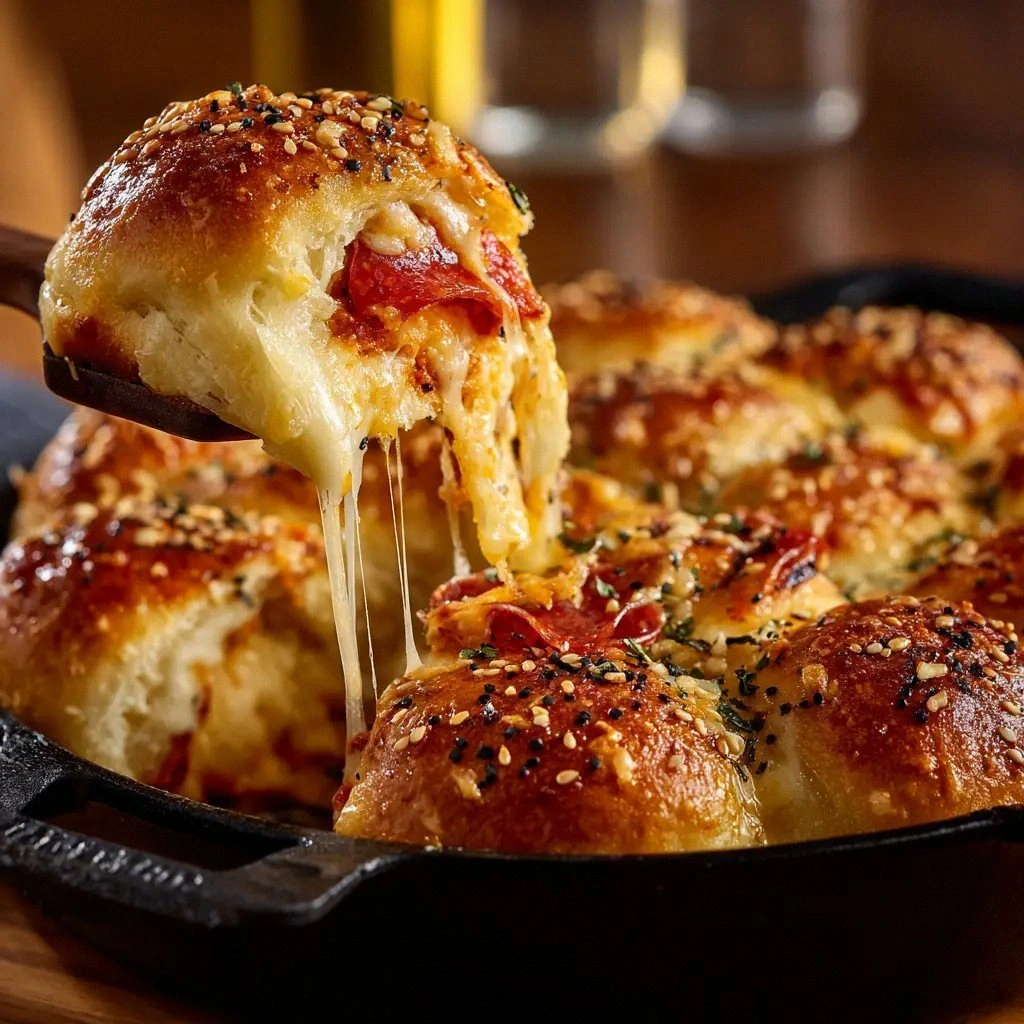
What sets this version apart is that it eliminates the common pitfalls that plague pizza sliders: soggy buns, uneven cheese melt, and an over‑cooked pepperoni that turns into a rubbery mess. The technique uses a buttery butter‑garlic glaze that locks in moisture, a precise baking time that ensures the cheese is bubbly but not burnt, and a final broil that gives the tops a caramelized finish. The result is a slider that delivers a crunch, a gooey cheese pull, and a pepperoni bite that’s perfectly seasoned. I dare you to taste this and not go back for seconds – because the first bite will have you craving more.
I’ll be honest – I ate half the batch before anyone else got to try it, and the whole kitchen smelled incredible for the next two hours. If you’ve ever struggled with this, you’re not alone – and I’ve got the fix. Picture yourself pulling this out of the oven, the whole kitchen smelling incredible, and the guests lining up for a second plate. Let me walk you through every single step – by the end, you’ll wonder how you ever made it any other way.
What Makes This Version Stand Out
- Texture: The buttery glaze creates a crisp exterior that holds the soft interior, preventing the rolls from becoming soggy.
- Flavor: A subtle blend of garlic powder and Italian seasoning in the butter enhances the tomato sauce without overpowering it.
- Cheese Pull: The mozzarella slices are pre‑topped, ensuring a dramatic, gooey stretch that feels like a mini mozzarella pull‑apart.
- Speed: The entire process takes less than an hour, making it an ideal crowd‑pleaser for impromptu gatherings.
- Make‑Ahead: Assemble the sliders ahead of time, chill, and bake just before serving – no last‑minute scrambling.
- Customization: Swap pepperoni for sausage, bacon, or a veggie alternative without compromising the structure.
Alright, let's break down exactly what goes into this masterpiece…
Inside the Ingredient List
The Flavor Base
The pizza sauce is the heart of this slider, thick enough to coat the roll without dripping. It should be seasoned with a pinch of oregano and a splash of red wine for depth. If you skip the sauce, the sliders will taste like plain bread. Swap the store‑bought sauce for a fresh blend of crushed tomatoes, basil, and garlic for a more vibrant flavor.
The Texture Crew
The Hawaiian sweet rolls provide a slightly sweet, yeasty foundation that contrasts beautifully with the savory toppings. Choose rolls that have a firm crust; softer rolls will collapse under the cheese. If you can’t find Hawaiian rolls, brioche buns work as a close substitute. Keep them at room temperature before baking to ensure even heat distribution.
The Unexpected Star
The butter‑garlic glaze is the secret weapon that seals in moisture and adds a subtle nutty flavor. Melt the butter with garlic powder and Italian seasoning, then brush it over the roll tops before adding sauce. This step prevents the rolls from drying out and gives the sliders a golden, appetizing sheen. A pinch of smoked paprika can add a smoky undertone if you’re feeling adventurous.
The Final Flourish
Mozzarella cheese slices are the ultimate gooey element, while pepperoni slices deliver a savory, slightly spicy kick. The cheese should be laid flat over the sauce, and the pepperoni arranged in a fan shape for even melting. If you prefer a dairy‑free version, use a plant‑based mozzarella alternative and a pepperoni substitute made from tempeh or seitan. The grated Parmesan adds a salty, umami finish that ties the whole slider together.
Everything's prepped? Good. Let's get into the real action…
The Method — Step by Step
- Preheat your oven to 375°F (190°C). Arrange the sweet rolls on a lightly greased baking sheet, spacing them about an inch apart. This spacing ensures even heat circulation and prevents the rolls from sticking together. I’ve found that a silicone mat works wonders for this step.
- In a small saucepan, melt 1/4 cup of butter over medium heat. Add 1/2 tsp garlic powder and 1 tsp Italian seasoning, stirring constantly. The butter should turn a light golden hue and emit a fragrant, savory aroma. This is the moment the kitchen smells like a cozy pizzeria.
- Brush the melted butter mixture generously over the tops of each roll. The butter coats the surface, creating a barrier that keeps the interior moist while the crust crisps. This simple step eliminates sogginess and adds a buttery flavor that pairs perfectly with the tomato sauce.
- Spread 1 cup of pizza sauce over each roll, using a spoon or a small spatula. The sauce should coat the roll evenly but not pool at the edges. If you prefer a thicker sauce, reduce the amount slightly. The sauce is the base that carries the pizza’s classic flavor profile.
- Place 8 slices of mozzarella cheese on top of the sauce, ensuring each slice covers the entire surface. The cheese should be evenly spread to avoid any cold spots. If you’re using a plant‑based cheese, let it sit at room temperature for a few minutes before adding.
- Arrange 24 pepperoni slices over the cheese, fanning them out to ensure each slider gets a generous portion. The pepperoni should be evenly spaced to avoid clumping. If you’re using a lower‑fat pepperoni, consider adding a few extra slices for flavor.
- Place the baking sheet in the preheated oven and bake for 20 minutes. The cheese should be bubbly and the edges of the rolls should turn a golden brown. Check the sliders at the 18‑minute mark to avoid over‑browning.
- For the final touch, switch the oven to broil and broil the sliders for 1–2 minutes until the tops develop a beautiful, caramelized crust. Keep the oven door slightly ajar to allow excess moisture to escape. The broil should give the sliders a slight char that mimics a pizza oven finish.
- Remove the sliders from the oven and let them rest for 2 minutes before serving. This brief rest allows the cheese to set slightly, making them easier to bite. Plate them on a platter and serve immediately while they’re still hot and gooey.
That's it – you did it. But hold on, I've got a few more tricks that'll take this to another level. These insider tips will help you avoid common pitfalls and elevate the flavor profile even further.
Insider Tricks for Flawless Results
The Temperature Rule Nobody Follows
Many home cooks bake sliders at 350°F, which leads to uneven melting and soggy rolls. By baking at 375°F, you create a hotter environment that crisps the crust while allowing the cheese to melt evenly. I’ve baked at 375°F for years, and the sliders always come out with a satisfying crunch. If you’re using a convection oven, lower the temperature by 25°F to compensate for the fan.
Why Your Nose Knows Best
The first scent you detect when the sliders are baking is the butter’s golden aroma. This aroma signals that the crust is forming, and the cheese is starting to bubble. Trust your nose to guide you to the perfect moment for broiling. If the aroma becomes sweet or burnt, it’s time to pull them out.
The 5‑Minute Rest That Changes Everything
Allowing the sliders to rest for 5 minutes after baking may seem like a waste of time, but it actually sets the cheese and helps the flavors meld. The rest period also prevents the sliders from sticking to the cutting board. I’ve seen sliders that were served immediately taste too runny; a brief pause fixes that.
The Butter‑Garlic Ratio Trick
If you prefer a milder butter flavor, reduce the garlic powder to 1/4 tsp. Conversely, for a more robust taste, double the garlic powder and add a pinch of crushed red pepper flakes. The butter acts as a flavor carrier, so the ratio directly impacts the overall taste. Adjusting this ratio lets you personalize the sliders to your palate.
The Pepperoni Placement Secret
Instead of stacking pepperoni slices, fan them out in a circular pattern around the cheese. This arrangement ensures each bite has a balanced pepperoni bite and prevents any one slider from being overly greasy. When you serve, the sliders look visually appealing with the pepperoni rings.
Creative Twists and Variations
This recipe is a playground. Here are some of my favorite ways to switch things up:
BBQ Chicken Slider
Swap pepperoni for shredded grilled chicken tossed in BBQ sauce. Add a drizzle of ranch dressing after broiling. The smoky sweetness of BBQ pairs wonderfully with the buttery crust.
Veggie Supreme
Replace pepperoni with sliced roasted bell peppers, zucchini, and olives. Top with a sprinkle of feta cheese instead of mozzarella. The veggies add a fresh crunch and a Mediterranean flair.
Buffalo Buffalo
Use buffalo chicken instead of pepperoni and drizzle hot sauce over the top before broiling. Finish with a dollop of blue cheese dressing. The spicy kick is perfect for game‑day crowds.
Mediterranean Delight
Replace pepperoni with sliced kalamata olives and capers. Add a layer of goat cheese and a squeeze of lemon juice after baking. The tangy goat cheese balances the salty olives.
Sweet & Savory Fusion
Add a thin layer of fig jam over the sauce before topping with mozzarella. The sweet jam contrasts with the salty pepperoni, creating a complex flavor profile.
Storing and Bringing It Back to Life
Fridge Storage
Store leftover sliders in an airtight container in the refrigerator for up to 3 days. The butter glaze helps keep the rolls from drying out, but they’ll still be best within the first 24 hours. When you’re ready to reheat, place them on a baking sheet and warm at 350°F for 10 minutes.
Freezer Friendly
For longer storage, wrap each slider individually in parchment paper and place them in a freezer bag. They’ll keep for up to 2 weeks. To reheat, thaw at room temperature for 30 minutes, then bake at 350°F for 15 minutes.
Best Reheating Method
Add a tiny splash of water to the bottom of the baking dish before reheating to create steam. The steam keeps the cheese from drying out and preserves the sliders’ gooey texture. Finish with a quick broil for 1 minute to restore the golden crust.