I never thought a single pan could hold an entire dinner, but that was the moment I realized the power of cast iron. The last time I tried making enchiladas, I ended up with a burnt, soggy mess that made my kitchen smell like regret. I stared at the charred edges and wondered why the sauce never thickened. Then I remembered that one recipe I’d seen on a cooking show where the skillet was the star, not a side dish. That night I decided to give it a shot and the rest is history.
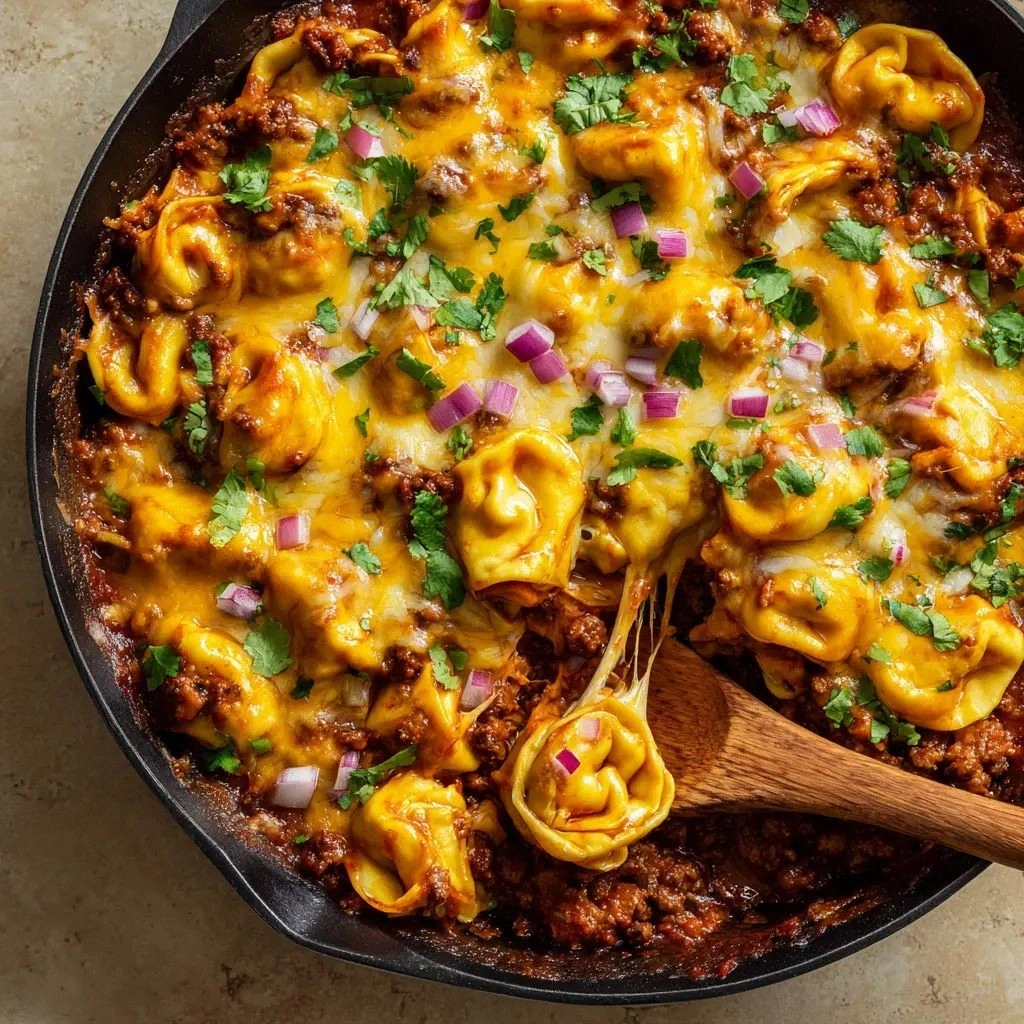
The air was thick with the scent of sizzling beef as it hit the hot skillet, a sound that made my heart race faster than a salsa beat. The aroma of taco seasoning mingled with the deep, smoky undertones of enchilada sauce, creating a bouquet that could make a grown man cry with joy. The texture of the beef turned from raw to caramelized, each bite delivering a burst of savory flavor that lingered on the tongue. The cast iron kept the heat steady, giving the tortellini a golden crust while the sauce simmered into a silky glaze. I could feel the heat radiating through my hands, a comforting reminder that this was about to become a masterpiece.
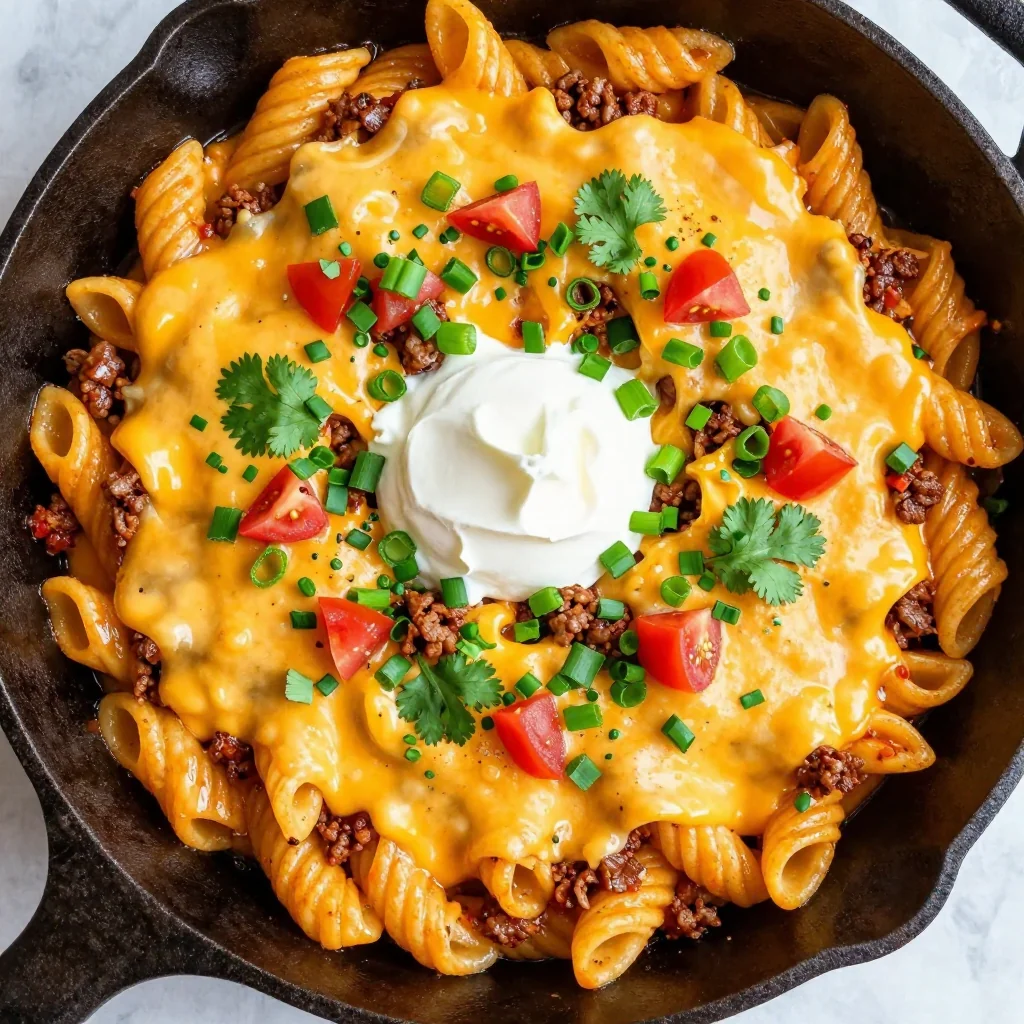
What makes this version stand out is that it’s not just beef and pasta; it’s a harmony of textures and flavors that dance together in the pan. I dare you to taste this and not go back for seconds, because the cheese melts into a velvety blanket that clings to every bite. The sauce coats the pasta like velvet, while the edges of the tortellini crisp up to a delightful crunch. The combination of sharp cheddar and Monterey Jack creates a melty, buttery finish that elevates the dish beyond ordinary enchiladas. The secret? A quick sear, a controlled simmer, and a final bake that turns the skillet into a flavor furnace.
Most recipes get this completely wrong by overcooking the pasta or letting the sauce evaporate. Here’s what actually works: keep the heat moderate, stir frequently, and finish the dish in the oven to lock in moisture and flavor. I’ve been told that this is hands down the best version you'll ever make at home because the cast iron delivers a depth of flavor that no other pan can. The result is a dish that looks like a casserole but tastes like a street‑food triumph. Picture yourself pulling this out of the oven, the whole kitchen smelling incredible, and the table already lined with hungry faces.
If you've ever struggled with enchiladas that fall apart, you're not alone — and I've got the fix. The trick is to let the beef brown properly before adding the sauce; this builds a flavor base that the pasta can soak up. I’ve also learned that adding a splash of water before reheating keeps the sauce from drying out. These small tweaks mean the difference between a mediocre meal and a crowd‑pleasing feast. Trust me, once you try this, you’ll wonder how you ever made it any other way.
That sizzle when the beef hits the pan? Absolute perfection. The sound is a cue that the skillet is ready to lock in flavor. The aroma that follows is a promise of the hearty, cheesy goodness to come. The first bite is a burst of savory, smoky, and creamy elements that mingle like old friends. And the last bite? It leaves a lingering warmth that makes you want to dig in again.
Okay, ready for the game‑changer? The next step is where the magic happens, and I’ll walk you through every single detail. The cast iron’s ability to retain heat means you can finish the dish in the oven without losing the sizzle. I’ll show you how to layer the ingredients so each component shines. Stay with me here — this is worth it. By the end, you’ll have a dish that’s both comforting and impressive.
Let me walk you through every single step — by the end, you'll wonder how you ever made it any other way. The process is straightforward, yet each step is crucial to achieving that perfect blend of textures and flavors. The final result will be a dish that feels like a warm hug and a fiesta all at once. You’ll be able to share it with friends, family, or anyone who appreciates a good meal. And trust me, the compliments will flow faster than the sauce.
Before we dive into the method, let’s take a quick look at what makes this version stand out from the rest. The ingredients are simple, the technique is foolproof, and the flavor profile is unforgettable. The cast iron skillet is the secret weapon that brings everything together. And the result? A dish that feels like a celebration in a single pan. Ready to see the magic? Let’s break it down.
What Makes This Version Stand Out
- Flavor: The sauce thickens into a rich, smoky glaze that coats the tortellini with a velvety sheen. The combination of taco seasoning and enchilada sauce creates layers of depth that keep you coming back for more. It’s a flavor profile that feels both familiar and adventurous.
- Texture: The cast iron keeps the heat steady, giving the tortellini a crisp edge that contrasts with the creamy interior. The cheese melts into a gooey blanket that holds everything together. The result is a dish that feels both comforting and indulgent.
- Ease: No complicated steps, no fancy equipment, just a skillet and a few ingredients. The method is straightforward, yet each step is designed to maximize flavor. Even a novice can master this recipe with minimal fuss.
- Uniqueness: Combining beef, tortellini, and enchilada sauce in a single pan is a culinary mash‑up that stands out from traditional enchiladas. The dish feels like a fusion of Mexican and Italian comfort foods. It’s a conversation starter at any dinner table.
- Crowd Appeal: The melty cheese and hearty beef make this dish a hit with both kids and adults. The dish can be served as a main or a side, making it versatile for any gathering. It’s the kind of meal that makes people ask for the recipe.
- Ingredient Quality: Using lean ground beef ensures a juicy, flavorful base without excess fat. The thick enchilada sauce provides a robust flavor that doesn’t get lost. Fresh cilantro and onions add a bright, aromatic finish.
- Cooking Method: The cast iron skillet’s heat retention allows for a quick sear followed by a gentle simmer, ensuring each component cooks evenly. The final bake locks in moisture and creates a golden top that’s impossible to resist.
- Make‑Ahead Potential: The dish can be prepared ahead of time and reheated without losing texture or flavor. The sauce thickens nicely when chilled, and the cheese remains gooey after reheating. It’s a perfect make‑ahead option for busy nights.
Alright, let's break down exactly what goes into this masterpiece...
Inside the Ingredient List
The Flavor Base
Olive oil is the foundation that allows the beef to brown evenly, creating a caramelized crust that locks in juices. A tablespoon is enough to coat the skillet without overpowering the other flavors. If you’re watching calories, a splash of avocado oil works just as well. The oil’s high smoke point ensures a consistent sear.
Ground beef provides the hearty, meaty backbone of the dish. A pound of lean beef offers the right balance of moisture and flavor. If you prefer a richer taste, you can switch to a higher fat content, but be prepared for a greasier skillet. The beef’s protein content gives the dish a satisfying bite.
Taco seasoning is the secret to the dish’s bold, smoky profile. The blend of cumin, chili powder, and paprika creates a warm, earthy base. If you’re a spice lover, add a pinch of cayenne for extra heat. The seasoning also helps the beef retain moisture during cooking.
The Texture Crew
The enchilada sauce thickens into a velvety coating that clings to each tortellini. Two cups of sauce are enough to create a generous, flavorful layer without drowning the pasta. If you want a spicier kick, use a sauce that contains fresh chilies. The sauce’s acidity balances the richness of the cheeses.
Cheese tortellini brings a comforting, pasta element that pairs perfectly with the sauce. Sixteen ounces of refrigerated tortellini are ideal for a four‑serving batch. The pasta’s shape holds the sauce in place, creating pockets of flavor. Fresh or frozen tortellini works, but refrigerated keeps the texture firm.
Cheddar and Monterey Jack cheeses provide a melty, gooey finish that ties everything together. A cup of each ensures a balanced blend of sharpness and creaminess. If you’re a cheese enthusiast, consider adding a sprinkle of pepper jack for a spicy twist. The cheeses melt into a golden crust that’s impossible to resist.
The Unexpected Star
Red onions add a subtle sweetness that complements the beef’s savory notes. A quarter cup is enough to provide a burst of flavor without overpowering the dish. Finely dice the onions for even distribution. If you’re allergic, substitute with scallions for a milder taste.
Cilantro brings a fresh, citrusy finish that brightens the dish. A quarter cup of chopped cilantro adds a pop of color and aroma. Add it at the end of cooking to preserve its delicate flavor. Cilantro also offers a slight peppery note that balances the richness.
Everything's prepped? Good. Let's get into the real action...
The Method — Step by Step
- Preheat the Oven: Set your oven to 375°F (190°C). The cast iron skillet will work best at a moderate temperature to keep the sauce from scorching. While the oven heats, gather all the ingredients to keep the process smooth. This step ensures the skillet is ready for the next stage.
- Heat the Skillet: Place the cast iron skillet on the stove over medium heat. Add one tablespoon of olive oil, letting it shimmer before adding the beef. The oil’s high smoke point allows the meat to sear without burning. This creates a caramelized crust that locks in juices.
- Sear the Beef: Add the one pound of ground beef to the skillet. Break it up with a wooden spoon and let it brown for about 5–7 minutes. The beef should develop a deep brown color; this signals that flavor is developing. When done, drain excess fat if desired.
- Add Taco Seasoning: Sprinkle two tablespoons of taco seasoning over the browned beef. Stir for about 30 seconds until the spices are fragrant. The seasoning infuses the meat with a warm, earthy base that enhances the sauce. This step is crucial for depth.
- Simmer with Sauce: Pour in two cups of thick dark red enchilada sauce. Bring the mixture to a gentle simmer, stirring occasionally. Let it reduce for 3–4 minutes so the sauce thickens slightly. The sauce should coat the beef without becoming too thin.
- Introduce Tortellini: Add the sixteen ounces of cheese tortellini to the skillet. Stir gently to coat each piece with the sauce and beef. Cook for about 5 minutes until the pasta is heated through and slightly tender. The pasta should absorb the sauce’s flavor.
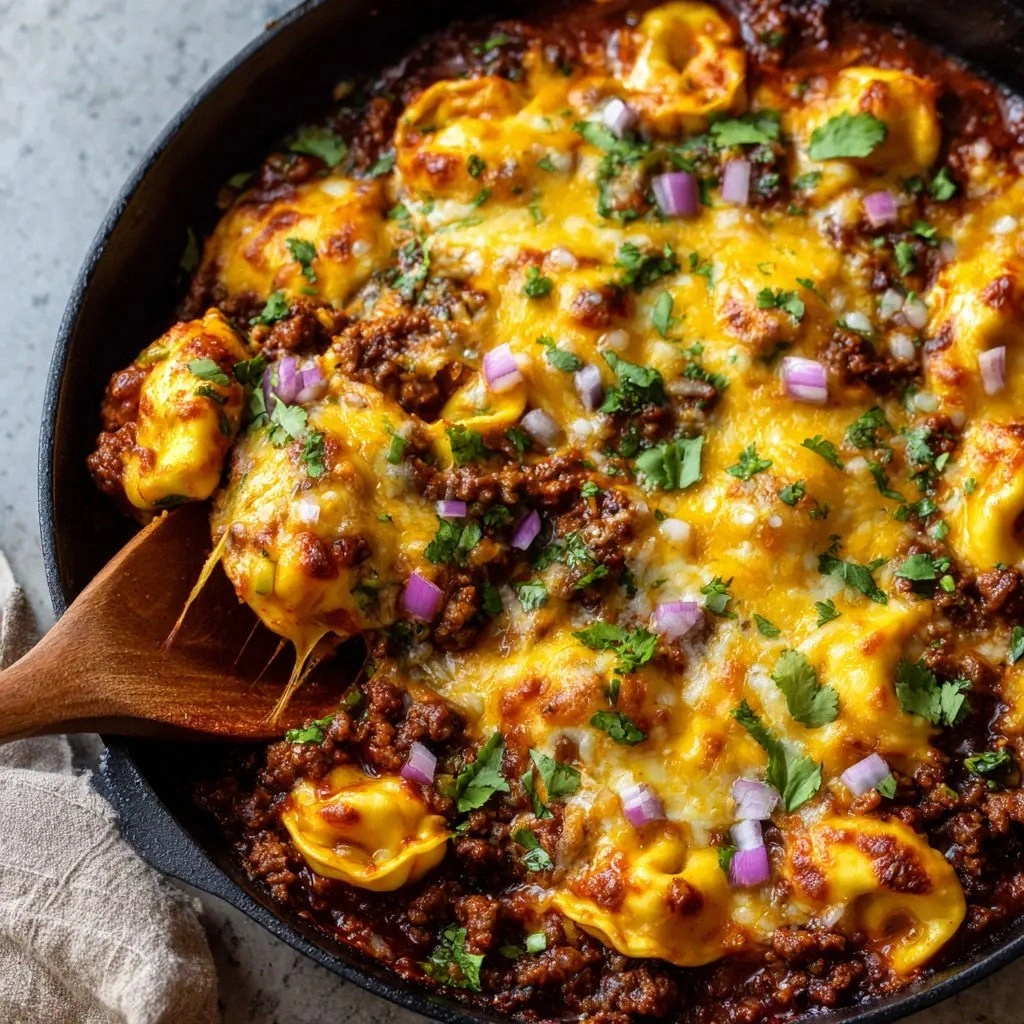
- Stir in Cheeses: Fold in half a cup each of sharp yellow cheddar and Monterey Jack. The cheeses should melt into a creamy coating that clings to the pasta. If you prefer a sharper bite, add an extra quarter cup of cheddar. The mixture should look glossy and slightly bubbly.
- Add Onions and Cilantro: Stir in a quarter cup of finely diced red onions and a quarter cup of chopped cilantro. The onions provide a sweet crunch while the cilantro adds a fresh, herbal note. This combination brightens the dish and balances the richness.
- Bake to Perfection: Transfer the skillet to the preheated oven. Bake for 10–12 minutes until the top is golden brown and bubbly. The oven finish crisps the edges and melts the remaining cheese. This step creates the final textural contrast.
- Rest and Serve: Let the skillet rest for 5 minutes before serving. The rest allows the flavors to settle and the cheese to set slightly for cleaner slices. Plate the dish with a side of guacamole or a fresh salad. Enjoy the symphony of textures and flavors.
That's it — you did it. But hold on, I've got a few more tricks that'll take this to another level...
Insider Tricks for Flawless Results
The Temperature Rule Nobody Follows
Many people think high heat is always better, but for this dish, a moderate temperature is key. Keep the skillet on medium to avoid scorching the sauce. The even heat ensures the beef browns without burning. This subtle adjustment makes the difference between a ruined dish and a triumph.
Why Your Nose Knows Best
The aroma of the sauce and beef is a reliable indicator of doneness. When the beef starts to emit a deep, caramelized scent, it’s ready to move on. The sauce should have a slightly thicker consistency. Trust your senses; they’re the best guide.
The 5-Minute Rest That Changes Everything
After baking, let the dish rest for five minutes. The cheese will set slightly, making it easier to scoop or spoon. The flavors will meld, creating a more cohesive taste. A quick rest is a small time investment that pays off big.
Keep It Moist, Not Dry
If you’re reheating leftovers, add a splash of water or broth before microwaving. This steams the dish back to life, preventing the cheese from becoming rubbery. The moisture keeps the tortellini tender and the sauce silky.
Finish with Fresh Herbs
Adding fresh cilantro or parsley right before serving brightens the dish and adds a fresh note. The herbs contrast the rich, cheesy flavors and give the dish a polished look. Sprinkle a handful over the top for a pop of color.
Creative Twists and Variations
This recipe is a playground. Here are some of my favorite ways to switch things up:
Spicy Jalapeño Kick
Slice a jalapeño and sauté it with the onions for a fiery punch. The heat will cut through the richness of the cheese and add a bold layer of flavor. Great for those who like a bit of spice.
Smoky Chipotle Twist
Swap the taco seasoning for chipotle powder and add a teaspoon of chipotle in adobo. The smoky flavor will deepen the sauce’s complexity and give the dish an earthy undertone.
Vegan Version
Replace the ground beef with crumbled tempeh or lentils. Use a plant-based enchilada sauce and vegan cheese. The result is a hearty, plant‑powered dish that still satisfies.
Cheesy Broccoli Mix‑in
Stir in a cup of steamed broccoli florets before baking. The vegetable adds color, crunch, and a nutritional boost. The broccoli absorbs the sauce, adding a subtle earthy note.
Breakfast Edition
Serve the dish with a side of scrambled eggs and a drizzle of salsa. The protein-packed breakfast version is a quick, satisfying start to your day.
Storing and Bringing It Back to Life
Fridge Storage
Cool the skillet to room temperature, then cover tightly with foil or a lid. Store in the refrigerator for up to three days. The sauce will thicken slightly, so add a splash of milk or broth before reheating.
Freezer Friendly
Pack the dish in a freezer‑safe container or zip‑top bag. It stays good for up to two months. When ready, thaw overnight in the fridge, then reheat on the stovetop with a little water.
Best Reheating Method
Reheat in a skillet over low heat, adding a splash of water to keep the sauce moist. Cover with a lid to trap steam and bring the cheese back to its melty glory. Alternatively, microwave with a damp paper towel for a quick fix.