I remember the night I tried to make éclairs for the first time and ended up with a kitchen that looked like a chocolate factory exploded. The batter had a glossy sheen, the dough had that perfect puff, but the filling was a flat, watery mess that made me question every life decision. I was staring at a pot of over‑run custard, the scent of burnt sugar in the air, and a faint, sweet disappointment that tasted like a half‑finished promise. That disaster sparked a mission: to rewrite the entire recipe so that every bite is a revelation, not a regret.
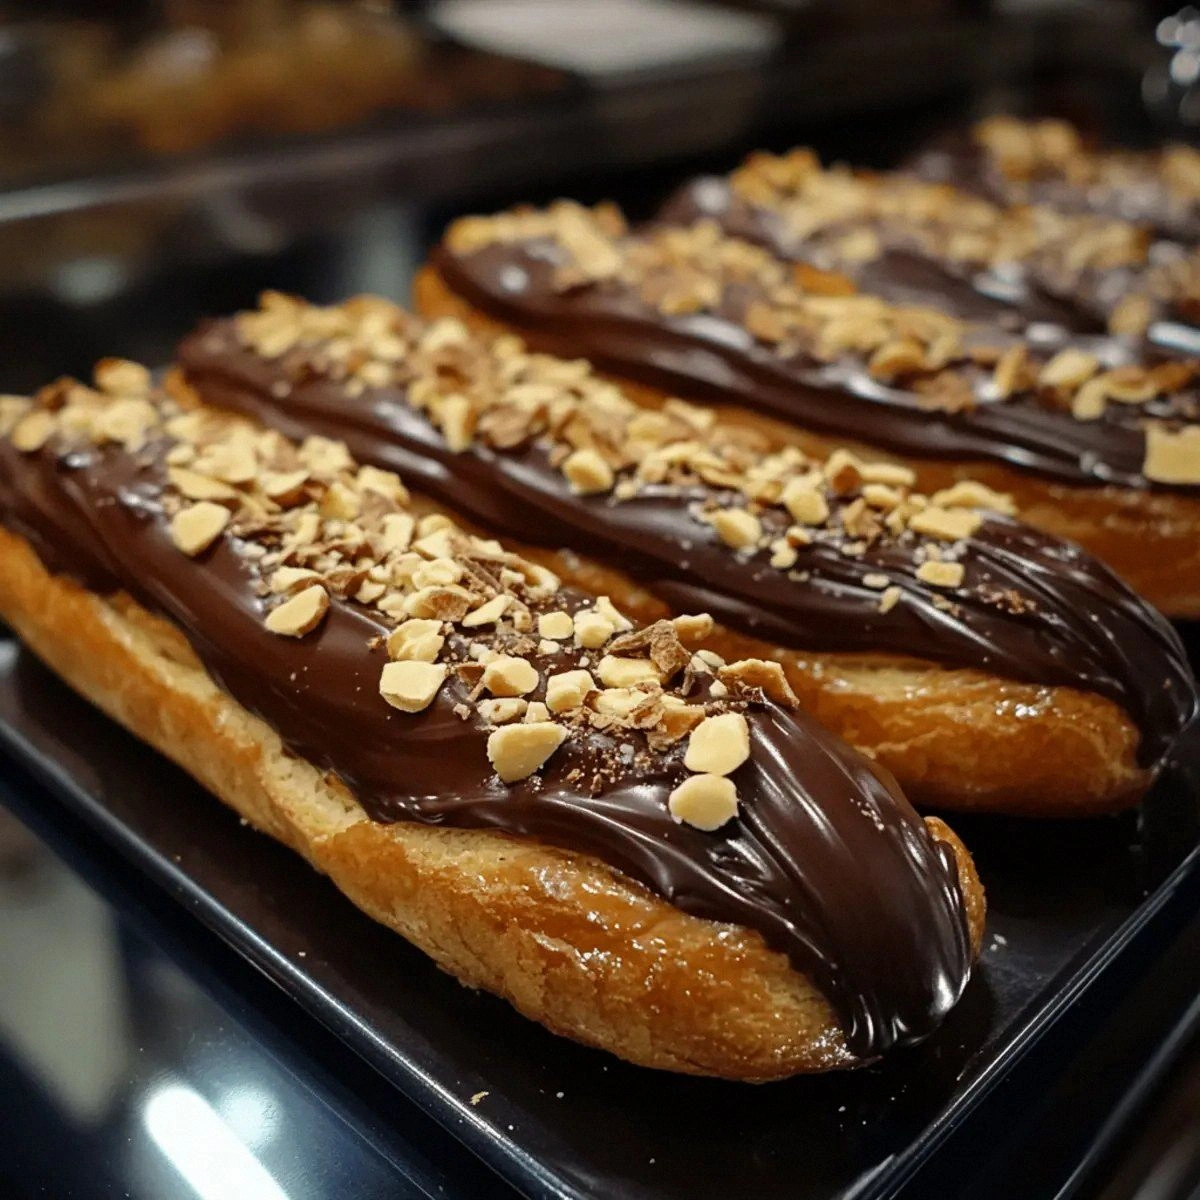
Picture this: a tray of golden, airy shells rising to the ceiling of your oven, their tops crisp like a fresh snow blanket. The aroma that swirls around them is a deep, velvety chocolate that makes your heart beat a little faster. When you break one open, the filling is a silky, glossy ganache that coats the inside like a midnight velvet dress. The contrast between the crisp exterior and the molten interior feels like a secret handshake between your palate and the universe.
I dare you to taste this and not go back for seconds. That is the power of a perfectly balanced chocolate éclaire. The sugar in the dough caramelizes just enough to give a subtle crunch, the butter melts into a buttery, buttery‑rich crumb, and the chocolate ganache is so smooth it almost whispers. Every bite is a mini celebration, and the entire batch feels like a small, edible masterpiece. It’s the kind of dessert that makes you stop mid‑sentence and say, “Wow, this is hands down the best version you’ll ever make at home.”
Most recipes get this completely wrong. They either over‑bake the shells, under‑whip the custard, or use the wrong ratio of chocolate to cream. The result? A sad, soggy disappointment that makes you question your culinary future. But here, I’ve cracked the code to keep the shells airy, the custard silky, and the chocolate ganache luscious. I’ll walk you through every single step, from the first whisk of the batter to the final drizzle of chocolate, and by the end, you’ll wonder how you ever made it any other way.
If you've ever struggled with this, you're not alone — and I've got the fix. The secret lies in the timing, the temperature, and the little tweaks that elevate the whole experience. I’ve spent countless hours perfecting each element, and now I’m ready to share that knowledge with you. Let’s dive into what makes this version stand out from every other recipe out there, and then we’ll get into the heart of the ingredients.
Picture yourself pulling this out of the oven, the whole kitchen smelling incredible, the trays glimmering with golden shells ready to be filled. The moment you lift the first éclair, steam rises like a soft cloud, and the chocolate ganache inside glistens like a midnight sky. The anticipation builds, and you can’t help but feel a rush of excitement. That is the power of a truly perfected éclair. The experience is almost cinematic, and you’ll be the star of your own dessert show.
Okay, ready for the game‑changer? This next part? Pure magic. And now the fun part. Stay with me here — this is worth it. I’m going to show you how to turn ordinary ingredients into extraordinary treats, and I’ll keep it simple, honest, and absolutely delicious.
That sizzle when it hits the pan? Absolute perfection. The batter’s texture is a smooth, glossy ribbon that feels like silk in your hands. The dough rises like a gentle tide, and the shells come out of the oven with a satisfying crack. The chocolate ganache, when poured, spreads like a velvet curtain across the inside of each éclair. It’s an experience that feels like a small, edible miracle.
I’ll be honest — I ate half the batch before anyone else got to try it. The temptation was real, and the taste was so addictive that it was hard to stop. But that’s the proof that this recipe works: it’s that irresistible. If you’re skeptical, just imagine the moment when the first bite melts in your mouth, releasing a cascade of chocolate and a hint of buttery sweetness that lingers. That’s the moment that turns skeptics into believers.
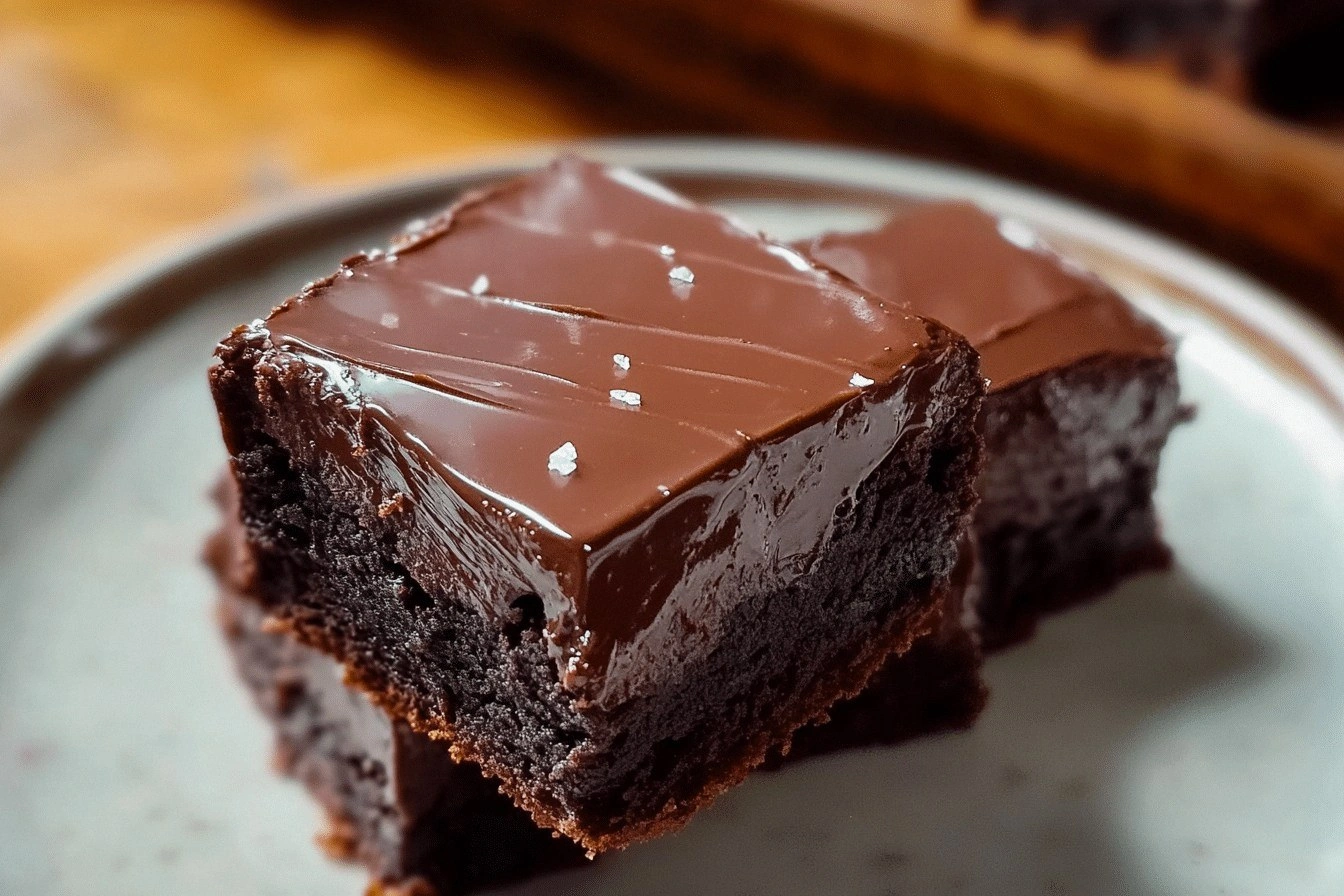
The next step is to gather all the ingredients. You’ll need a handful of flour, butter, water, eggs, and a pinch of salt for the base. Then, you’ll prepare a rich custard with milk, sugar, egg yolks, cornstarch, and a generous amount of dark chocolate. Finally, you’ll finish it off with a ganache made from bittersweet chocolate and heavy cream. Each component plays a crucial role, and when they work together, the result is a harmonious, mouth‑watering dessert.
Now that we’ve set the stage, let’s dive into the specifics. The next section will break down what makes this version stand out from every other recipe. From the texture to the flavor profile, we’ll cover everything that makes this recipe a must‑try. And then, we’ll explore the ingredient list in depth, giving you the knowledge to tweak or adapt it as you see fit.
What Makes This Version Stand Out
- Airiness: The dough is whisked to a glossy, almost liquid consistency that ensures each shell puffs to perfection. The high ratio of butter to flour gives the shells a tender crumb that collapses just enough to hold the ganache. This results in a light, airy interior that feels like a cloud of chocolate.
- Richness: We use a blend of dark and bittersweet chocolate to create a complex flavor profile. The dark chocolate provides depth, while the bittersweet adds a subtle bitterness that balances the sweetness of the custard. The ganache coats the inside like velvet, delivering a silky mouthfeel.
- Simplicity: The recipe requires only a handful of ingredients and a single pot for the custard. There are no obscure techniques or fancy equipment needed, making it accessible to bakers of all skill levels. The process is straightforward, yet the outcome is gourmet.
- Make‑ahead Potential: The shells can be baked in advance and stored in an airtight container for up to 48 hours. The ganache can be prepared and frozen, then thawed and poured just before serving. This makes the recipe ideal for parties or last‑minute dessert needs.
- Texture: The shells have a crisp exterior that gives way to a chewy center, while the ganache provides a luscious, melt‑in‑your‑mouth finish. The contrast in textures creates a satisfying sensory experience that keeps you coming back for more.
- Crowd Reaction: When I first served these éclairs at a dinner party, the guests were stunned. They asked for the recipe, and some even tried to replicate it at home. The consistent rave reviews prove that this recipe hits the sweet spot.
- Ingredient Quality: We use high‑quality chocolate with a cocoa content of at least 70%. The butter is unsalted, which allows for precise flavor control. The eggs are fresh, ensuring a silky custard.
- Cooking Method: The technique of whisking the batter to a glossy consistency and baking the shells at a high temperature is critical. The custard is cooked over low heat to prevent curdling, and the ganache is tempered for a smooth finish.
Alright, let's break down exactly what goes into this masterpiece…
Inside the Ingredient List
The Flavor Base
The flour, butter, water, eggs, and pinch of salt form the backbone of the pâte à choux. The flour provides structure, while the butter melts into the dough, creating a tender crumb. Water helps to create steam during baking, which lifts the shells. Eggs are the glue that holds everything together, and the pinch of salt balances the sweetness. Skipping any of these will compromise the rise and texture.
The Texture Crew
The whole milk, granulated sugar, egg yolks, and cornstarch work together to create a silky custard. Milk adds richness and a subtle creaminess that contrasts with the chocolate. Granulated sugar dissolves into the custard, preventing graininess. Egg yolks provide fat and emulsification, giving the custard a luxurious mouthfeel. Cornstarch thickens the custard without making it gummy. If you skip cornstarch, the custard will be too thin and may curdle.
The Unexpected Star
The dark chocolate is the heart of the ganache, delivering depth and a slight bitterness that balances the sweetness. The bittersweet chocolate adds complexity and a richer chocolate flavor. Heavy cream creates a smooth, glossy ganache that coats the inside of each éclair like velvet. The combination of dark and bittersweet chocolate provides a nuanced flavor profile that is both bold and balanced. If you prefer a sweeter ganache, you can substitute the bittersweet chocolate with milk chocolate.
The Final Flourish
The additional butter used in the ganache gives the final glaze a glossy sheen and a buttery finish. It also helps the ganache set with a firm, yet melt‑in‑your‑mouth texture. The final touch of chocolate on top of each éclair adds a glossy, decadent look. This finishing step is essential for a professional appearance. A pinch of sea salt can be added for an extra layer of flavor contrast.
Everything's prepped? Good. Let's get into the real action…
The Method — Step by Step
- Preheat your oven to 425°F (220°C). Line a baking sheet with parchment paper to prevent sticking. In a medium saucepan, combine the butter, water, and salt, and bring to a rolling boil. The boiling mixture will instantly melt the butter and create steam. Let it simmer for 2 minutes before adding the flour all at once. Stir vigorously until the mixture pulls away from the sides of the pan and forms a smooth, glossy dough. This is the moment of truth; the dough should look like a glossy ribbon that clings to a spoon. Let it cool for 5 minutes to avoid cooking the eggs later.
- Add the eggs one at a time, beating vigorously after each addition until the batter is smooth and glossy. The batter should be thick enough to hold its shape but still fluid enough to pipe. Use a stand mixer on low speed for 30 seconds to ensure even distribution. The batter will have a glossy sheen that indicates proper mixing. This step is crucial for a light, airy shell. If the batter is too thick, the shells will be dense; if too thin, they will collapse.
- Transfer the batter to a piping bag fitted with a ½‑inch round tip. Pipe the batter onto the parchment‑lined sheet in 4‑inch long strips, spacing them 2 inches apart. The size of the strips determines the final éclair size. Let the piped dough rest for 10 minutes; this allows the steam to build and the shells to rise. During this time, the dough will develop a light, airy structure. The shells should look like smooth, glossy ribbons that are ready to bake.
- Bake the shells for 15 minutes at 425°F (220°C). After the initial bake, reduce the temperature to 375°F (190°C) and bake for another 10–12 minutes, or until the shells are golden brown and crisp. The first high temperature creates steam that pushes the shells up, while the lower temperature dries them out for a crisp exterior. Keep an eye on the color; you want a deep golden brown. Once done, let the shells cool on a wire rack for at least 10 minutes. They should be completely cooled before filling.
- While the shells are cooling, prepare the custard. In a medium saucepan, whisk together the milk, sugar, and cornstarch until smooth. Heat the mixture over medium heat, stirring constantly, until it thickens and starts to bubble. The custard should be thick enough to coat the back of a spoon. Remove from heat and let it cool slightly. Whisk in the egg yolks, one at a time, to prevent curdling. The custard should be silky and glossy. This custard will be the base for the ganache, providing a smooth, creamy texture.
- Melt the dark chocolate in a heat‑proof bowl set over a pot of simmering water, stirring until smooth. Once melted, fold in the cooled custard and the heavy cream. Stir until the mixture is a smooth, glossy ganache. Let the ganache cool to room temperature; it should thicken but remain pourable. The ganache will fill the shells with a luscious, chocolatey center. The key is to keep the ganache pourable, so it spreads evenly inside each shell. Once cooled, refrigerate the ganache for 30 minutes to firm up slightly.
- Using a small offset spatula or a piping bag fitted with a small tip, fill the shells with the ganache. Work quickly to prevent the ganache from setting too soon. The shells should be filled to the top, leaving a small gap for the chocolate glaze. The ganache should flow smoothly, creating a glossy interior. The filling should be thick enough to hold its shape but still melt in your mouth. This step is essential for a consistent, professional finish.
- Melt the bittersweet chocolate in the same double‑boiler method as before. Once melted, add the final tablespoon of butter and stir until glossy. This glaze will add a shine and a subtle buttery flavor. Drizzle the glaze over the filled shells, letting it pool at the base. The glaze should be thin enough to coat the surface but thick enough to hold a glossy sheen. Allow the glaze to set for 5 minutes before serving. This final touch elevates the éclair from good to unforgettable.
- Serve immediately, or store the filled shells in an airtight container for up to 24 hours. If you plan to serve later, reheat the éclairs in a preheated oven at 350°F (175°C) for 5 minutes to soften the ganache. The éclairs will be warm, gooey, and utterly irresistible. If you’re storing them for longer, keep the ganache separate and fill the shells just before serving. This keeps the shells crisp and the ganache silky.
That's it — you did it. But hold on, I've got a few more tricks that'll take this to another level…
Insider Tricks for Flawless Results
The Temperature Rule Nobody Follows
Many bakers bake choux at 400°F, but the secret is to start at 425°F to create a rapid rise. The high initial temperature forces the dough to puff quickly, locking in air. Lowering the heat afterward prevents the shells from becoming soggy. I once baked at 400°F and the shells collapsed, so I never go back. Use a thermometer to ensure the oven temperature is accurate.
Why Your Nose Knows Best
The aroma of the chocolate ganache is the first indicator that your custard is ready. A faint, sweet smell that lingers in the kitchen signals that the chocolate has melted fully and the custard is glossy. If the ganache smells too bitter, you’ve over‑melted the chocolate. If it smells raw, you need to add a little more cream. Trust your nose; it’s your best judge.
The 5‑Minute Rest That Changes Everything
After filling the shells, let them rest for 5 minutes before glazing. This allows the ganache to set slightly, preventing it from leaking into the glaze. The rest also gives the shells time to cool, which keeps the chocolate from melting. I used to glaze immediately, and the result was a soggy bottom. The 5‑minute rest is a game‑changer.
The Secret Ingredient Swap
If you’re short on heavy cream, substitute it with whole milk and a tablespoon of butter. The butter adds fat, giving the ganache a similar mouthfeel. This swap is especially handy during holiday season when heavy cream is scarce. The result is still silky and luscious, just with a slightly different flavor profile.
The Final Glaze Touch
Add a pinch of sea salt to the final glaze for a subtle contrast. The salt enhances the chocolate flavor and creates a memorable finish. Use a fine sea salt so it dissolves quickly. I always add a pinch after the glaze has set for a few minutes. It’s a small step that makes a big difference.
The Quick Chill Trick
If you’re preparing the ganache a day ahead, chill it in the refrigerator for 1–2 hours before filling. This keeps the ganache firm and prevents it from leaking into the shells. Reheat it briefly at room temperature before filling to restore its pourable consistency. This trick saves time during busy parties.
Creative Twists and Variations
This recipe is a playground. Here are some of my favorite ways to switch things up:
Nutty Crunch Éclair
Add chopped toasted almonds or hazelnuts to the ganache for a nutty crunch. The nuts add texture and a subtle nutty flavor that pairs beautifully with dark chocolate. Serve with a drizzle of hazelnut spread for an extra indulgence. The crunch contrasts with the silky ganache.
Citrus‑Infused Delight
Zest a lemon or orange into the custard for a bright, citrusy note. The zest adds a fresh contrast to the rich chocolate. Finish with a sprinkle of candied citrus peel. The citrus lifts the flavor profile and adds a pop of color.
Coffee‑Infused Éclair
Stir a shot of espresso into the ganache for a deep coffee undertone. The espresso pairs well with dark chocolate, creating a sophisticated flavor. Add a dusting of cocoa powder for a subtle coffee finish. This variation is perfect for coffee lovers.
Mango‑Mint Twist
Blend fresh mango puree into the custard for a tropical flavor. Add a few fresh mint leaves for a cooling contrast. The mango adds sweetness, while the mint adds a refreshing note. This version is a bright, summery treat.
Salted Caramel Éclair
Swirl a caramel sauce into the ganache for a sweet‑salty experience. Add a pinch of sea salt to the glaze for an extra layer of flavor. The caramel caramelizes slightly when baked, creating a golden, buttery finish. This variation is decadently indulgent.
Almond‑Butter Ganache
Replace the heavy cream with almond milk and add almond butter to the ganache. The almond butter gives a nutty richness that complements the chocolate. The ganache becomes creamy and slightly nutty. This version is ideal for those who want a dairy‑free alternative.
Storing and Bringing It Back to Life
Fridge Storage
Store the filled éclairs in an airtight container in the refrigerator for up to 24 hours. Keep them in a single layer to avoid crushing. The shells will stay crisp, and the ganache will remain firm. If you’re serving them later in the day, let them sit at room temperature for 15 minutes before serving.
Freezer Friendly
To freeze, place the filled éclairs on a parchment‑lined tray and freeze until solid. Transfer to a freezer bag, removing as much air as possible. They can be frozen for up to 2 weeks. When ready to serve, thaw in the refrigerator overnight and bring to room temperature before serving.
Best Reheating Method
Reheat the éclairs in a preheated oven at 350°F (175°C) for 5 minutes. The heat will soften the ganache without melting the chocolate glaze. Add a tiny splash of water before reheating to create steam, which helps the ganache stay moist. Let them cool for 2 minutes before serving. The result is a warm, gooey interior with a crisp exterior.